ชั้น 29 ออฟฟิศเศส แอท เซ็นทรัลเวิลด์

999/9 พระราม 1 กรุงเทพฯ 10330

บริการตลอด 24 ชั่วโมง

ทุกวัน ไม่เว้นวันหยุด

0-2107-3466

โทรเลยดิจะรออะไร

Home Roundcube วิธีเพิ่มผู้ติดต่อเข้า Group Contact ใน Roundcube Webmail

วิธีเพิ่มผู้ติดต่อเข้า Group Contact ใน Roundcube Webmail

หลังจากเพิ่มรายชื่อผู้ติดต่อใน Address Book แล้ว คุณสามารถนำผู้ติดต่อแต่ละรายเข้า Group Contact เพื่อจัดหมวดหมู่และบริหารจัดการรายชื่อใน Roundcube Webmail ให้เป็นระเบียบมากขึ้นได้ตามขั้นตอนต่อไปนี้

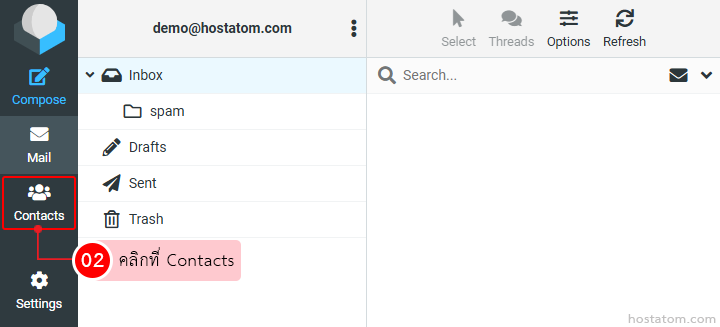
คลิกที่ Contacts

Left-side navigation of an email app; the 'Contacts' tab is selected, highlighted with a red box, indicating to click Contacts.

กรณีที่เพิ่มผู้ติดต่อรายเดียว

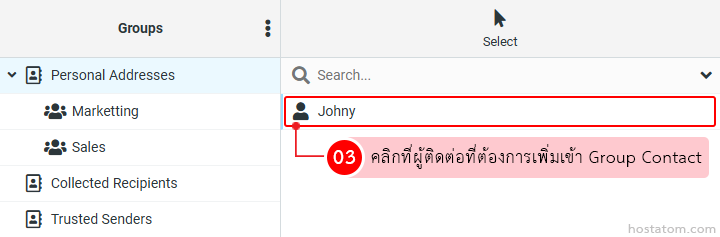
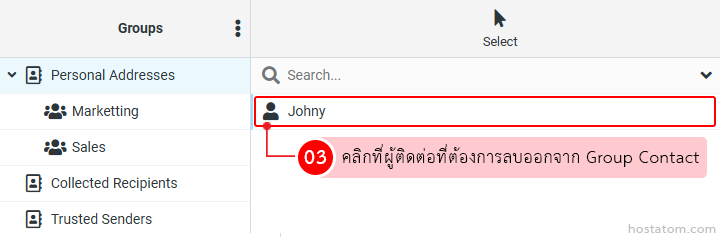
คลิกที่ผู้ติดต่อที่ต้องการเพิ่มเข้า Group Contact

UI for managing groups: Personal Addresses with Marketing and Sales groups; a selection list shows Jane, Johny, and Paul to add to Group Contact (Thai instruction shown).

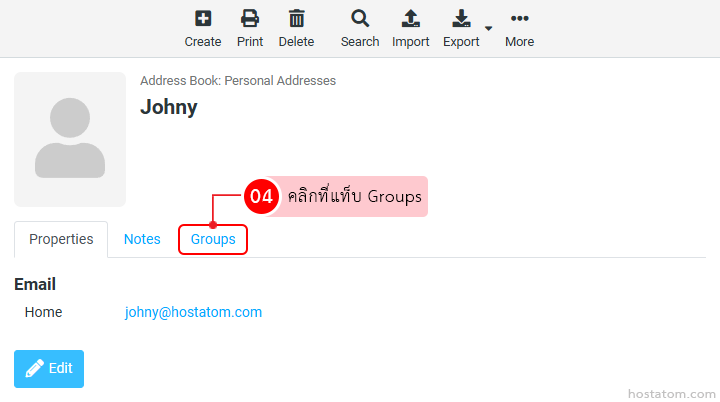
ในหน้าข้อมูลผู้ติดต่อ ให้คลิกที่แท็บ Groups

Profile page for Johny in an address book; avatar on left, name at top, with Tabs including Notes and highlighted Groups tab.

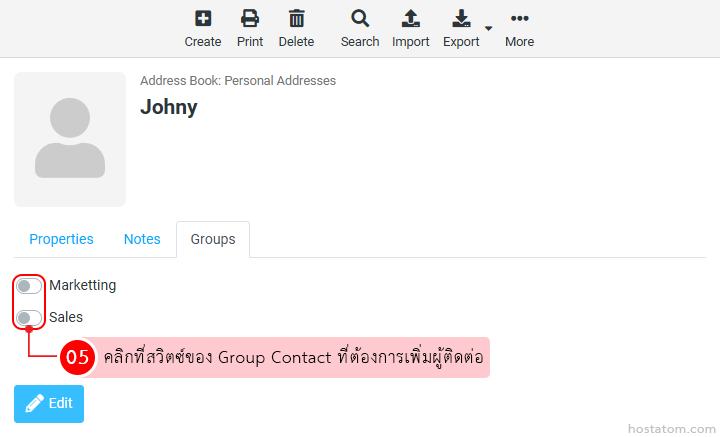
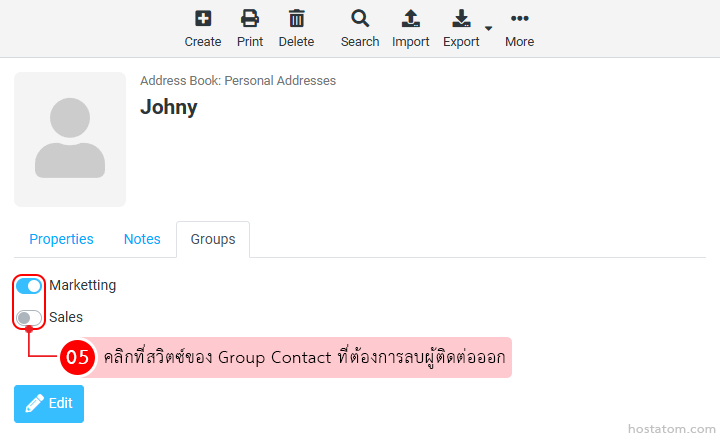
คลิกที่สวิตซ์ของ Group Contact ที่ต้องการเพิ่มผู้ติดต่อ

UI screen of a contact detail for Johny showing Group toggles for Marketing and Sales; instruction bubble in Thai prompts selecting a group to add the contact.

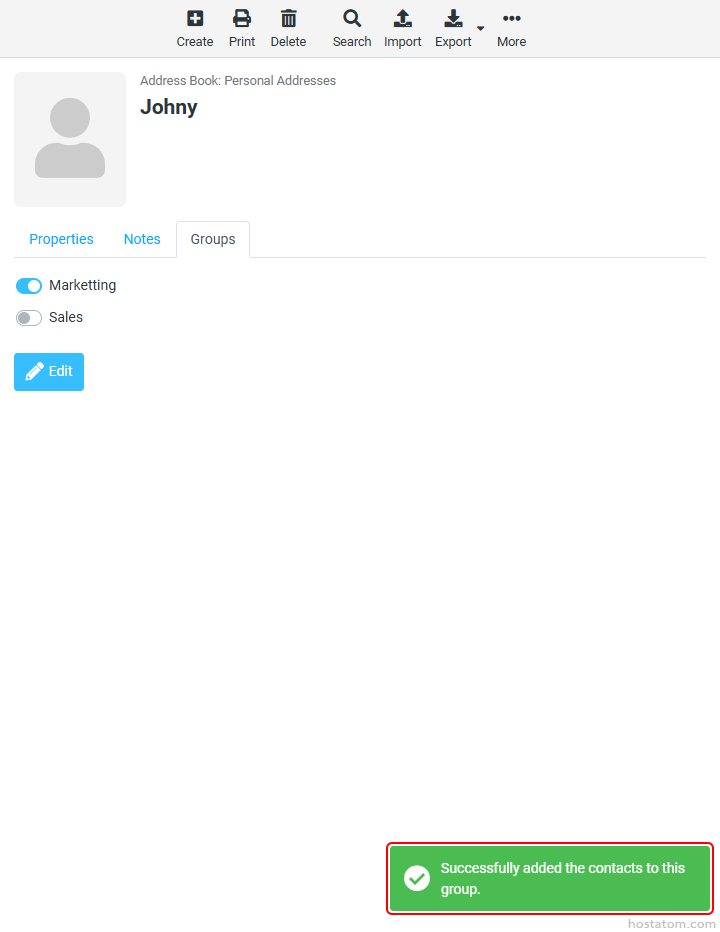
ระบบจะแจ้งว่าได้เพิ่มผู้ติดต่อเข้า Group Contact ดังกล่าวแล้ว

Profile card for Johny in the address book, Groups tab showing Marketing on and Sales off, with an Edit button and a bottom-right success toast saying the contacts were added to the group

กรณีที่เพิ่มผู้ติดต่อหลายรายชื่อ

คลิกที่ Select

UI: Contacts/Groups panel with Personal Addresses, Collected Recipients, Trusted Senders on the left; right shows a Search field and names Jane, Johnny, Paul with a Select button at top-right

คลิกที่ Selection

Screenshot of a contacts app showing left navigation, groups like Marketing and Sales, and a Selection dropdown with options (Current page, Invert, None).

ติ๊ก √ ที่ผู้ติดต่อที่ต้องการเพิ่มเข้า Group Contact

UI for grouping contacts: left panel lists groups, right panel shows contacts (Jane, Johnny, Paul) with checkboxes to select and add to a group; a pink tooltip notes adding to Group Contact.

คลิกที่ More

Toolbar with icons for Create, Print, Delete, Search, Import, Export, and More; More button highlighted with a red outline (step 06).

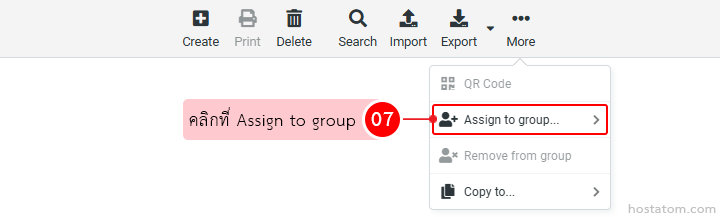
คลิกที่ Assign to group

Pink message badge with Thai text and number 07; dropdown menu shows 'Assign to group...' highlighted nearby.

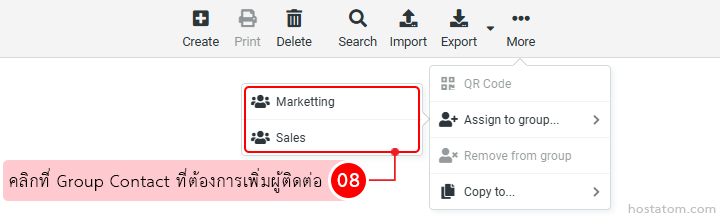
คลิกที่ Group Contact ที่ต้องการเพิ่มผู้ติดต่อ

Screenshot of a contact management UI with Marketing and Sales groups highlighted; Thai instruction asks to click the desired Group Contact to add a contact.

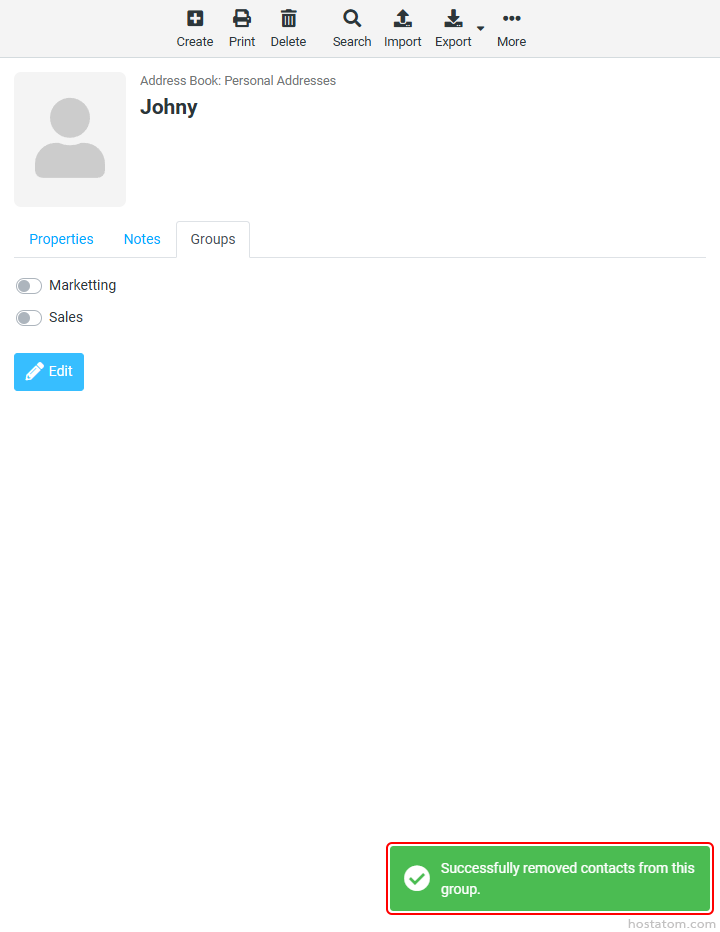
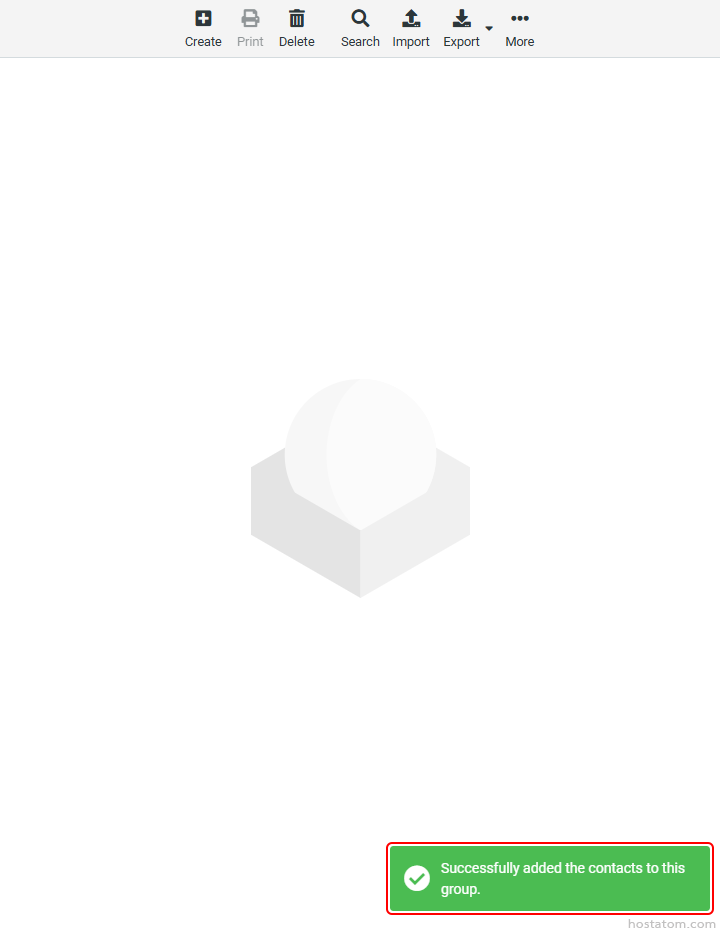
ระบบจะแจ้งว่าได้เพิ่มผู้ติดต่อที่เลือกเข้าไปยัง Group Contact ดังกล่าวแล้ว

Green success toast in the bottom-right corner stating: 'Successfully added the contacts to this group' with a white checkmark icon.

หากคุณกำลังมองหาเว็บโฮสติ้งที่ใช้งานง่ายและปลอดภัย สามารถดูรายละเอียดแพ็กเกจ Web Hosting ของเราได้ที่
👉 https://www.hostatom.com/web-hosting