การใช้ Class Attribute
Attribute class มักจะถูกใช้เพื่อชี้ไปยังชื่อ Class ในส่วน Style Sheet และยังสามารถใช้ JavaScript เพื่อเข้าถึงและจัดการองค์ประกอบที่ถูกระบุชื่อ Class ที่สร้างไว้
จากตัวอย่างด้านล่างนี้ มี Elements <div> กับ class Attribute ที่มีค่าชื่อว่า “city” ทั้ง 3 Elements <div> นี้จะถูกจัดให้มีรูปแบบเหมือนกันตามค่าที่กำหนดไว้ใน .city ที่ตั้งไว้ในส่วนของ Header
<!DOCTYPE html>
<html>
<head>
<style>
.city {
  background-color: tomato;
  color: white;
  border: 2px solid black;
  margin: 20px;
  padding: 20px;
}
</style>
</head>
<body>

<div class="city">
<h2>London</h2>
<p>London is the capital of England.</p>
</div>

<div class="city">
<h2>Paris</h2>
<p>Paris is the capital of France.</p>
</div>

<div class="city">
<h2>Tokyo</h2>
<p>Tokyo is the capital of Japan.</p>
</div>

</body>
</html>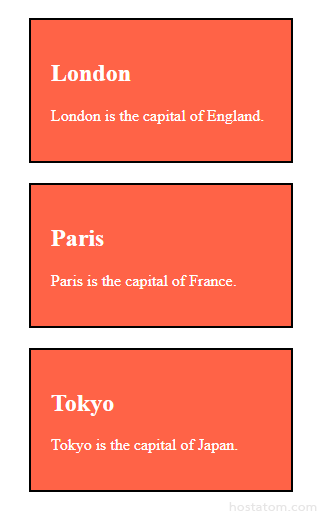
จากตัวอย่างด้านล่างนี้ เรามีการใช้ Element <span> 2 Elements กับ class Attribute ที่มีค่าชื่อว่า “note” ทั้ง 2 Elements <span> นี้จะถูกจัดให้มีรูปแบบเหมือนกันตามค่าที่กำหนดไว้ใน .note ที่ตั้งไว้ในส่วนของ Header
<!DOCTYPE html>
<html>
<head>
<style>
.note {
  font-size: 120%;
  color: red;
}
</style>
</head>
<body>

<h1>นี่คือ <span class="note">ข้อความสำคัญ</span> ส่วนหัวเรื่อง</h1>
<p>นี่เป็นเพียงบางส่วน <span class="note">ข้อความสำคัญ</span> ของบทความ</p>

</body>
</html>
Tip: Attribute <class> จะสามารถใช้กับ Element HTML ได้ทุกอัน
Note: ชื่อ Class นั้นจะต้องระวังเรื่องตัวพิมพ์เล็ก ใหญ่ที่ใช้ด้วย
The Syntax For Class
สำหรับการสร้าง Class นั้นให้เขียนจุด (.) จากนั้นตามด้วยชื่อ Class แล้วระบบ CSS Properties ภายใต้ { }
ตัวอย่างการเขียน Class
<!DOCTYPE html>
<html>
<head>
<style>
.city {
  background-color: tomato;
  color: white;
  padding: 10px;
}
</style>
</head>
<body>

<h2>The class Attribute</h2>
<p>การใช้ CSS กับ style Elements โดยใช้ชื่อ class ว่า "city":</p>

<h2 class="city">London</h2>
<p>London is the capital of England.</p>

<h2 class="city">Paris</h2>
<p>Paris is the capital of France.</p>

<h2 class="city">Tokyo</h2>
<p>Tokyo is the capital of Japan.</p>

</body>
</html>
Multiple Classes
Element HTML สามารถมี Class ได้มากกว่า 1
ในกรณีที่มีหลายๆ Class จะแยกแต่ละ Class ด้วยการเว้นวรรค ยกตัวอย่างเช่น <div class=”city main”> ซึ่ง Element จะถูกจัดรูปแบบตาม Class ที่ระบุ
จากตัวอย่างด้านล่างนี้ Element <h2> แรกนั้นเป็น Class ของ city ทั้งหมดรวมถึง Class main ด้วย และรูปแบบของ CSS Styles จะได้รับการจัดรูปแบบจาก Class ด้วยเช่นกัน
<!DOCTYPE html>
<html>
<head>
<style>
.city {
  background-color: tomato;
  color: white;
  padding: 10px;
}

.main {
  text-align: center;
}
</style>
</head>
<body>

<h2>Multiple Classes</h2>
<p>นี่เป็น h2 Elements ทั้ง 3 Elements ซึ่งใช้งาน class "city" นอกจากนี้ London ยังใช้ class "main" ซึ่งมีการจัดรูปแบบข้อความแบบกึ่งกลางด้วย</p>

<h2 class="city main">London</h2>
<h2 class="city">Paris</h2>
<h2 class="city">Tokyo</h2>

</body>
</html>
Elements ที่ต่างกัน สามารถใช้ Class เดียวกันได้
Elements HTML ที่แตกต่างกัน สามารถใช้ Class เดียวกันได้
จากตัวอย่างด้านล่างทั้ง <h2> และ <p> ใช้ Class “city” และมีการแชร์รูปแบบเดียวกัน
<!DOCTYPE html>
<html>
<head>
<style>
.city {
  background-color: tomato;
  color: white;
  padding: 10px;
}
</style>
</head>
<body>

<h2>Elements ที่ต่างกัน สามารถใช้ Class เดียวกันได้</h2>

<p>แม้ว่าทั้ง 2 Elements จะมี Tag ที่ไม่เหมือนกัน แต่ทั้ง 2 นั้นมีการชี้ไปยัง class เดียวกันและมีรูปแบบ CSS เหมือนกัน</p>

<h2 class="city">Paris</h2>
<p class="city">Paris is the capital of France.</p>

</body>
</html>
การใช้ Attribute Class ใน JavaScript
ชื่อ Class มักจะถูกใช้โดย JavaScript เพื่อทำหน้าที่บางอย่างสำหรับองค์ประกอบเฉพาะ
JavaScript สามารถเข้าถึง Elements ด้วยชื่อ Class โดยเฉพาะด้วยวิธีการ getElementsByClassName()
<!DOCTYPE html>
<html>
<body>

<h2>การใช้ Attribute class ใน JavaScript</h2>
<p>คลิกที่ปุ่มเพื่อซ่อน Elements ที่ใช้งาน class "city" ทั้งหมด:</p>

<button onclick="myFunction()">Hide elements</button>

<h2 class="city">London</h2>
<p>London is the capital of England.</p>

<h2 class="city">Paris</h2>
<p>Paris is the capital of France.</p>

<h2 class="city">Tokyo</h2>
<p>Tokyo is the capital of Japan.</p>

<script>
function myFunction() {
  var x = document.getElementsByClassName("city");
  for (var i = 0; i < x.length; i++) {
    x[i].style.display = "none";
  }
}
</script>

</body>
</html>
เมื่อคลิกที่ปุ่ม “Hide elements” จะแสดงผลลัพธ์ ดังภาพ

สรุป
- Attribute Class ของ HTML จะระบุชื่ออย่างน้อย 1 ชื่อสำหรับ Element
- JavaScript และ CSS สามารถใช้ Class ได้ในการเลือกและเข้าถึง Element เฉพาะได้
- Attribute Class สามารถใช้ได้กับทุก Element HTML
- ชื่อ Class นั้นจะต้องระวังเรื่องตัวพิมพ์เล็ก ใหญ่ที่ใช้ด้วย
- Elements ที่ต่างกัน สามารถใช้ Class เดียวกันได้
- JavaScript สามารถเข้าถึง Elements ด้วยชื่อ Class โดยเฉพาะด้วยวิธีการ getElementsByClassName()