สำหรับผู้ที่ใช้งานบริการ Microsoft 365 แอดมินหรือผู้ดูแลระบบนสามารถเข้าไปตั้งค่าเปิดใช้งาน เพื่อบอกให้ผู้ใช้งานทราบว่าอีเมลที่ถูกส่งมานั้น ถูกส่งมาจากภายนอกองค์กร
ข้อดีของการเปิดใช้งาน Tag นี้จะช่วยเตือนผู้ใช้จากการคลิกลิงก์ที่เป็นอันตรายหรืออีเมลสแปมหรือฟิชชิ่งเมล ที่ส่งมาจากภายนอกองค์กรของคุณ
ขั้นตอนการตั้งค่ามี ดังนี้
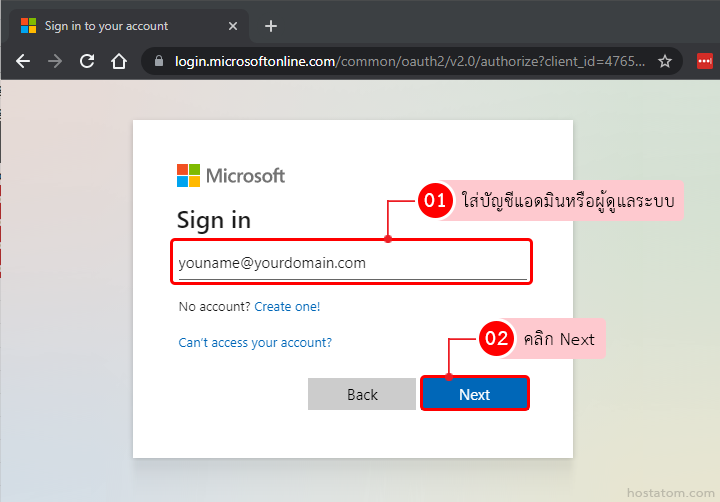
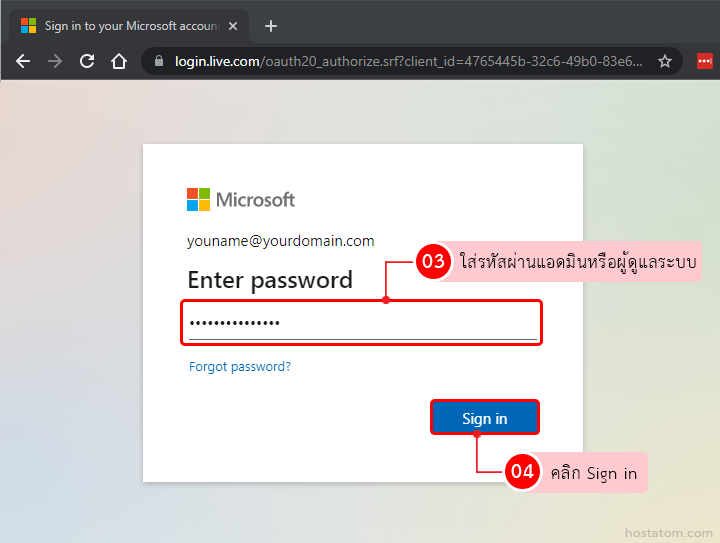
ทำการ Login เข้าสู่ Microsoft 365 admin center ที่ portal.office.com โดยใช้ username และรหัสผ่านระดับแอดมิน
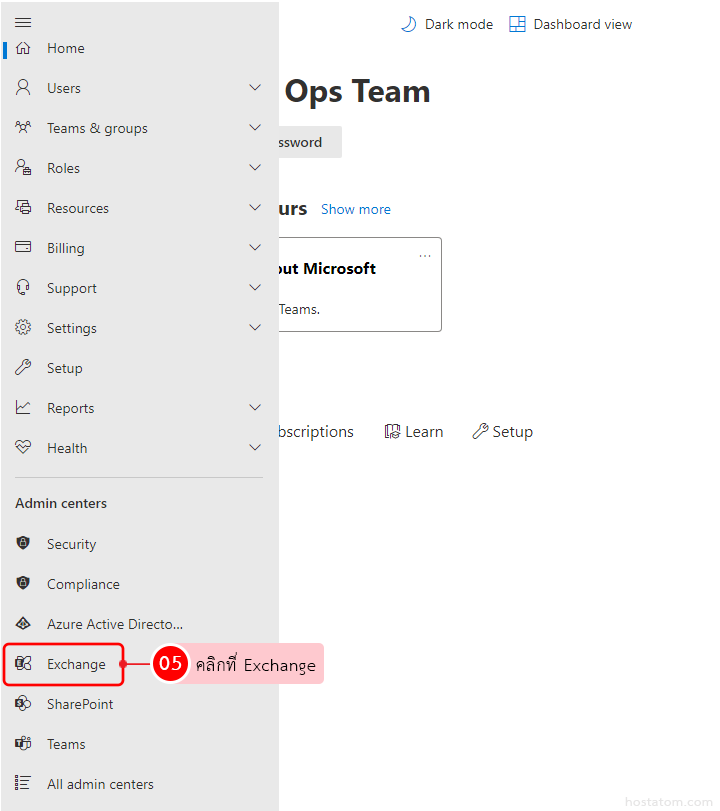
ในหน้า Microsoft 365 admin center ที่เมนูด้านซ้ายมือ คลิกที่ Exchange ดังภาพ
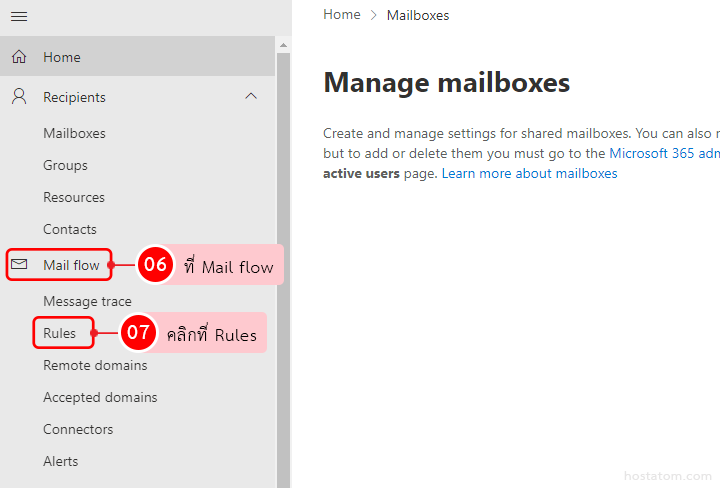
ที่ Mail flow ให้คลิกที่ Rules
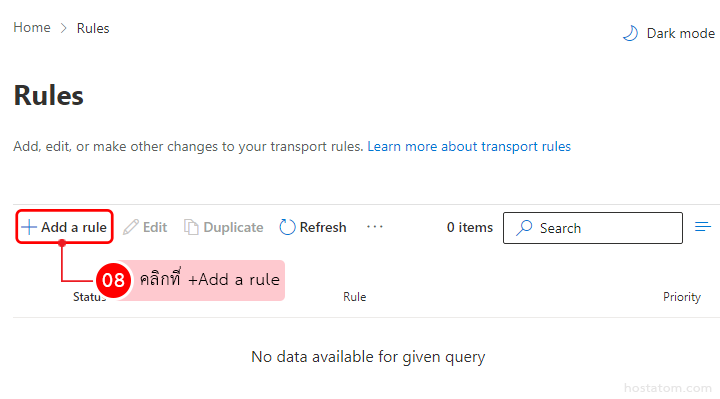
คลิกที่ + Add a rule เพื่อเพิ่มกฎ
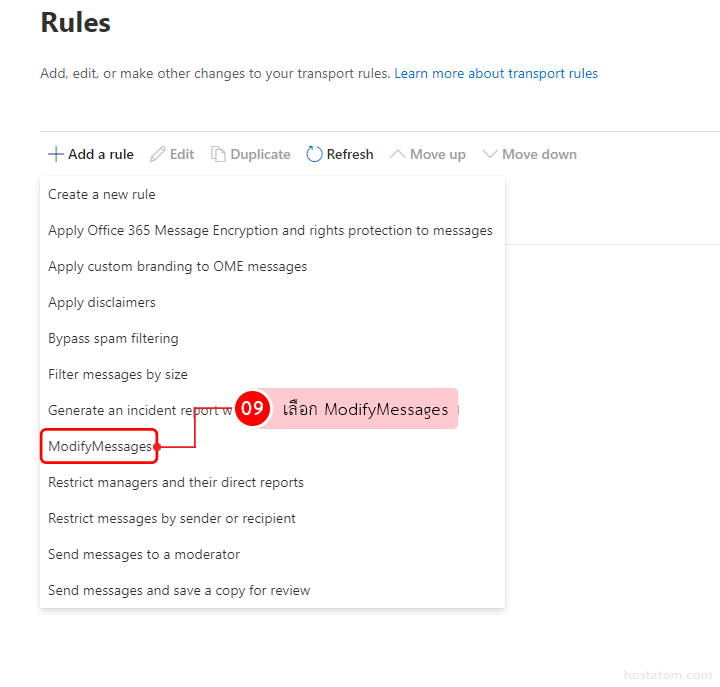
เลือก ModifyMessages
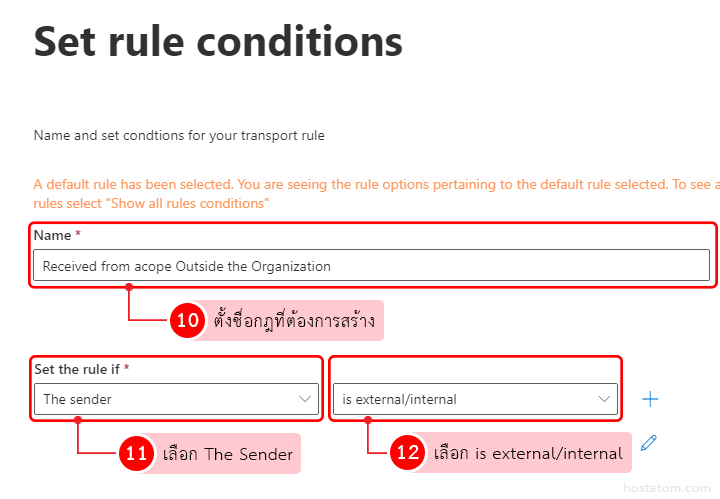
จากนั้นให้ทำการตั้งค่า Set rule conditions โดยมีรายละเอียดของการตั้งค่าดังนี้
- Name: ให้ใส่ชื่อของกฎ โดยให้ตั้งขึ้นมาเอง จากตัวอย่างเราจะตั้งกฎให้แสดง Tag ข้อความ External เมื่อมีอีเมลจากภายนอกองค์กรส่งเข้ามา ดังนั้นขอใส่ว่า Received from scope Outside the Organization
- Set the rule if: ให้เลือก The Sender ส่วนข้างหลังให้เลือก is external/internal ดังภาพ
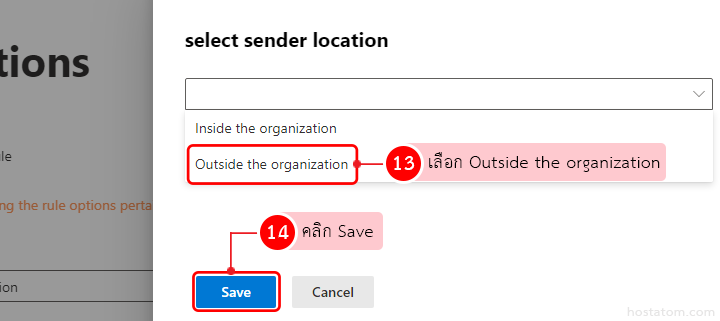
ระบบจะแสดงหน้าต่างขึ้นมาด้านข้าง เพื่อให้เลือก location
ซึ่งเราจะทำการสร้าง Tag เพื่อบอกว่าอีเมลฉบับนั้นถูกส่งมาจากผู้ที่อยู่นอกองค์กร ดังนั้นให้เลือก Outside the organization จากนั้นกดปุ่ม Save เพื่อบันทึกการตั้งค่า
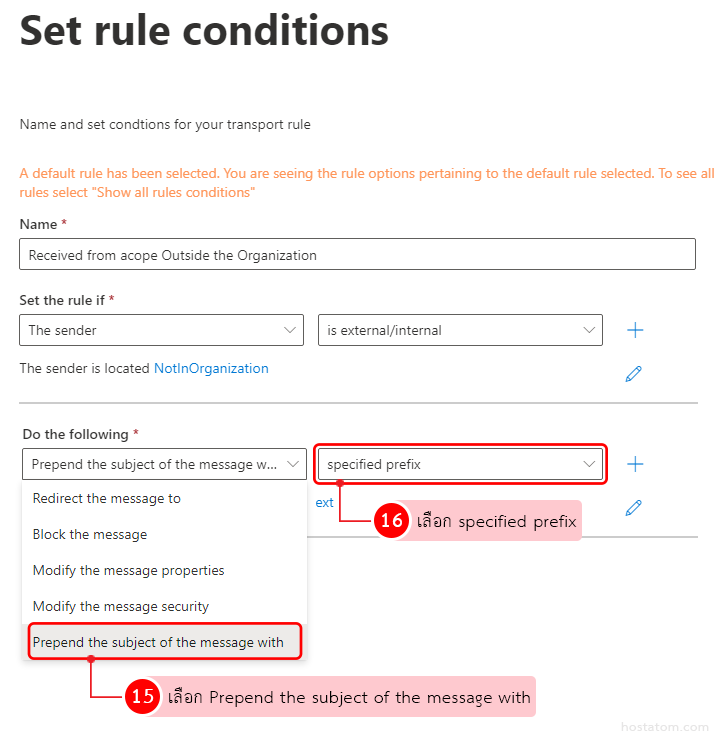
- Do the following: ช่องแรกให้เลือก Prepend the subject of the message with ช่องที่ 2 ให้เลือก specified prefix
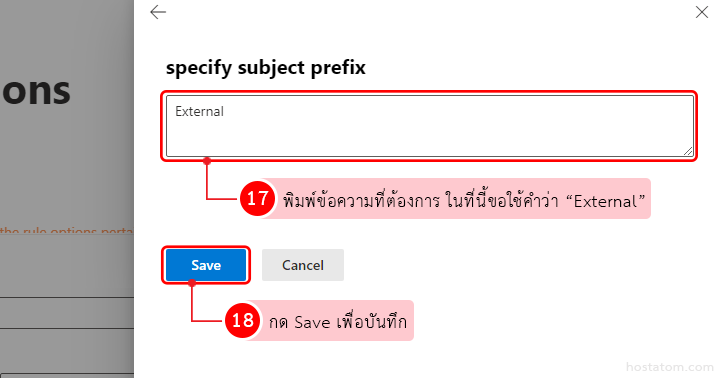
เมื่อเลือกข้อที่ 2 เรียบร้อยแล้ว ระบบจะแสดงหน้าต่างขึ้นมาด้านข้างให้ใส่ข้อความที่เราต้องการในช่อง specify subject prefix ซึ่งจากตัวอย่างนี้ขอเลือกใช้คำว่า “External”
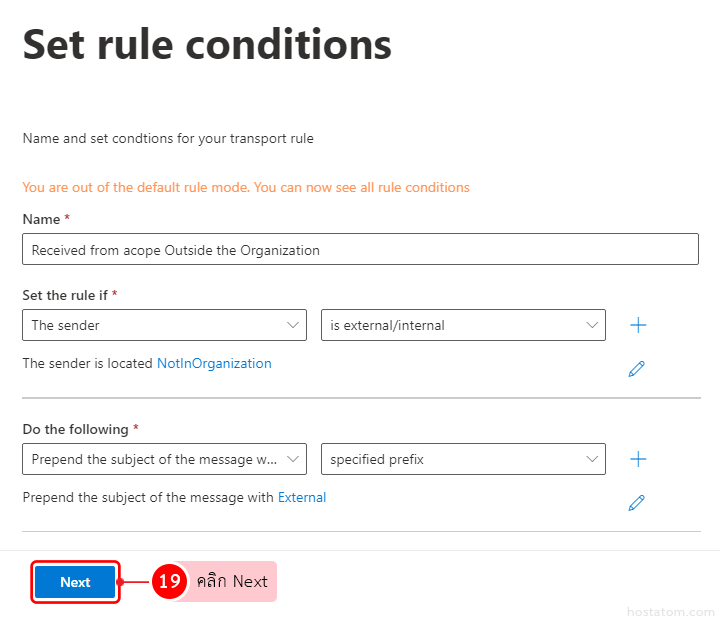
คลิกที่ปุ่ม Next
ในหน้าถัดของการ Settings for your transport rule ในหน้านี้ไม่ต้องดำเนินการตั้งค่าใดๆ ให้ใช้ค่า default ที่ระบบตั้งมาได้เลย ให้กดปุ่ม Next
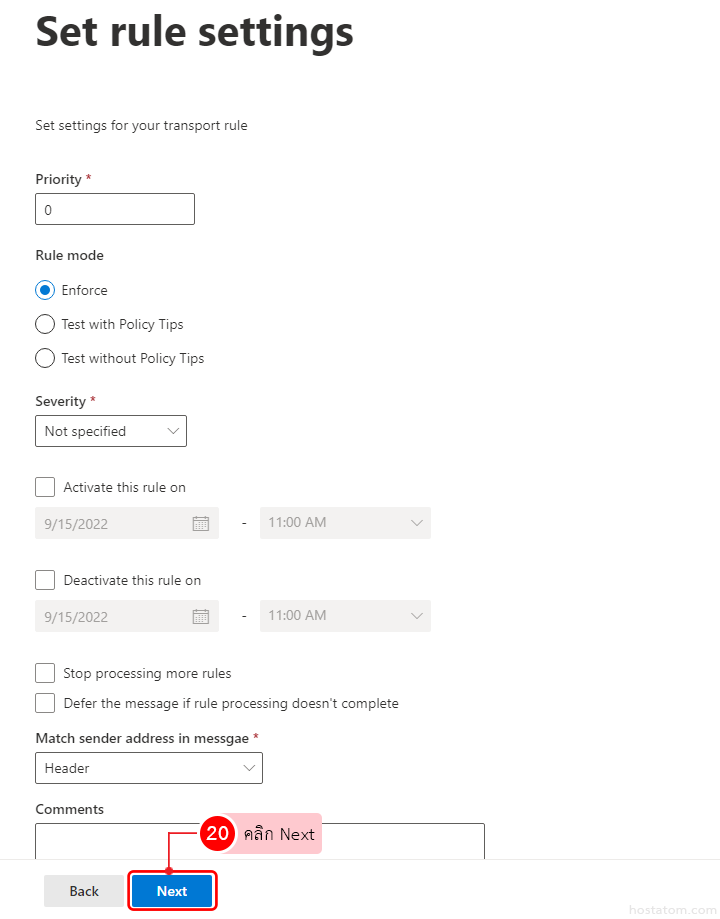
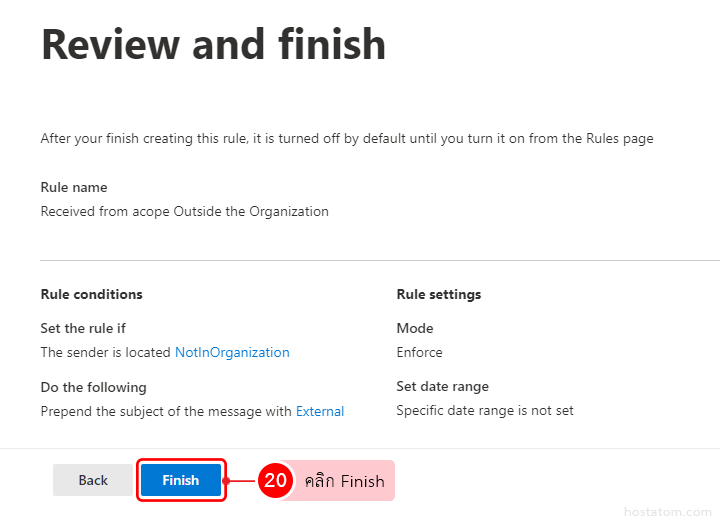
ระบบจะเข้าสู่หน้า Review and Finish
ให้เราทำการตรวจสอบการตั้งค่าว่าถูกต้องตรงตามที่เราต้องการหรือไม่ หากต้องการกลับไปแก้ไขการตั้งค่าให้คลิกที่ Back แต่ถ้าการตั้งค่าตรงกับความต้องการของเราแล้วให้คลิกที่ Finish
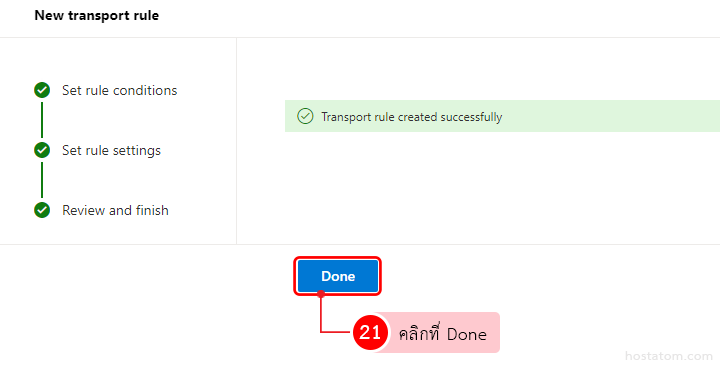
ระบบจะแสดงหน้าว่าการตั้งกฎของเราเสร็จเรียบร้อยแล้ว คลิกที่ปุ่ม Done
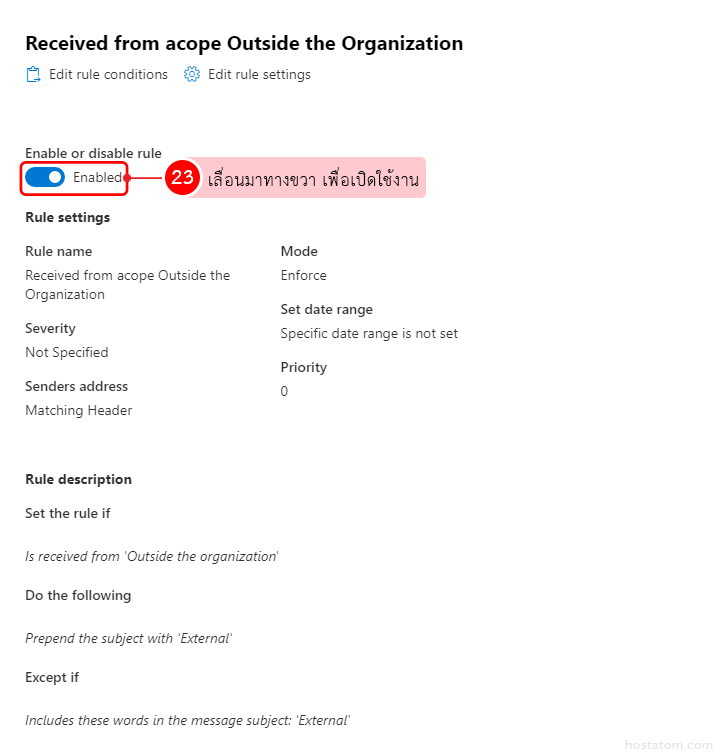
แต่ระบบยังไม่ได้เปิดการใช้งานกฎที่เราสร้างขึ้นมา ดังนั้นเราจึงต้องมาเปิดการใช้งานกฎอีกครั้ง โดยไปที่ Rule คลิกที่ Rule เราสร้าง ดังภาพ
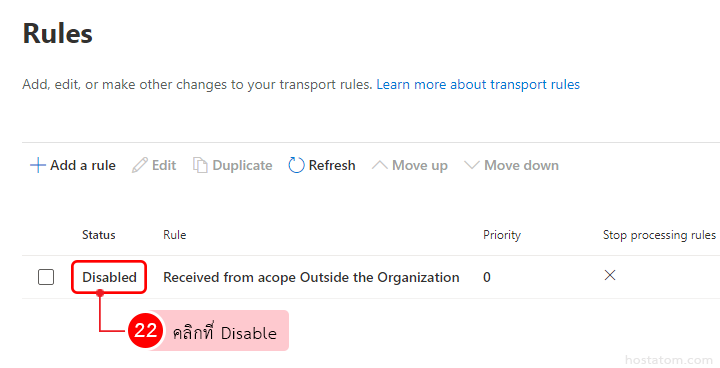
ระบบจะแสดงหน้าต่างขึ้นมาด้านข้าง ที่ Enable or disable rule ให้เลื่อนมาทางขวา เพื่อเปิดใช้งานกฎที่สร้างขึ้น
เท่านี้ก็เรียบร้อยแล้ว เวลามีอีเมลเข้ามาในกล่อง inbox ก็จะแสดง Tag ข้อความ External ตามที่เราตั้งค่าไว้นะคะ

