
คุณสามารถเปิด/ปิดการใช้งาน auto-reply mail หรือเมลตอบกลับอัตโนมัติ ใน control panel ของ Plesk ได้ตามขั้นตอนต่อไปนี้
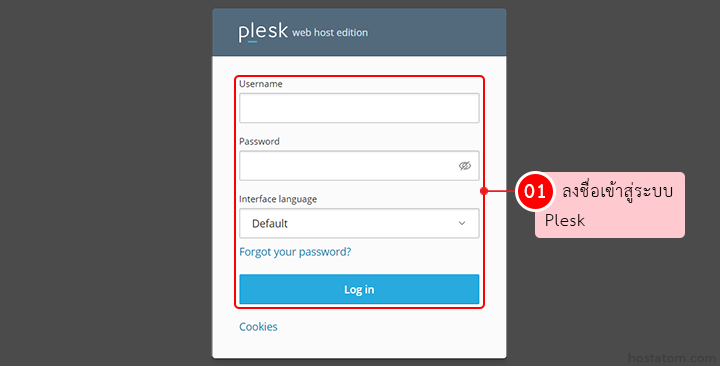
เริ่มจาก login เข้าใช้งาน Plesk
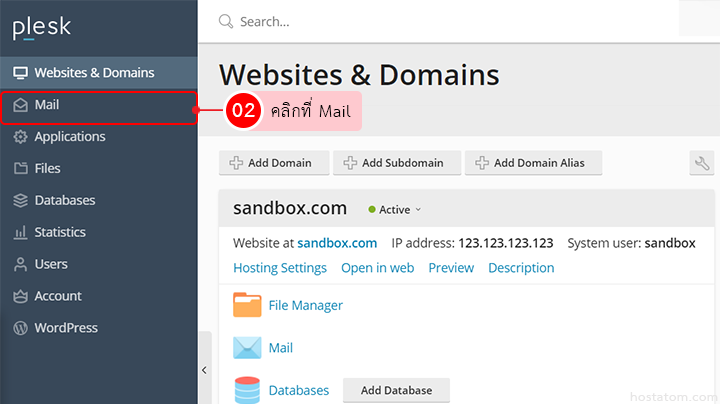
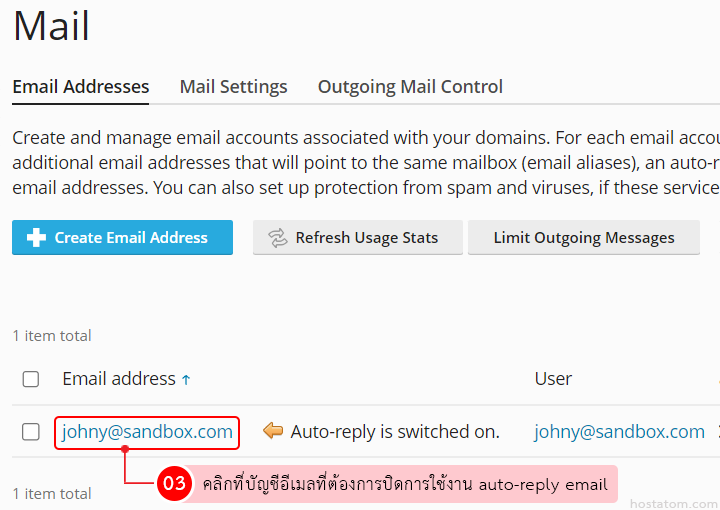
คลิกที่ Mail
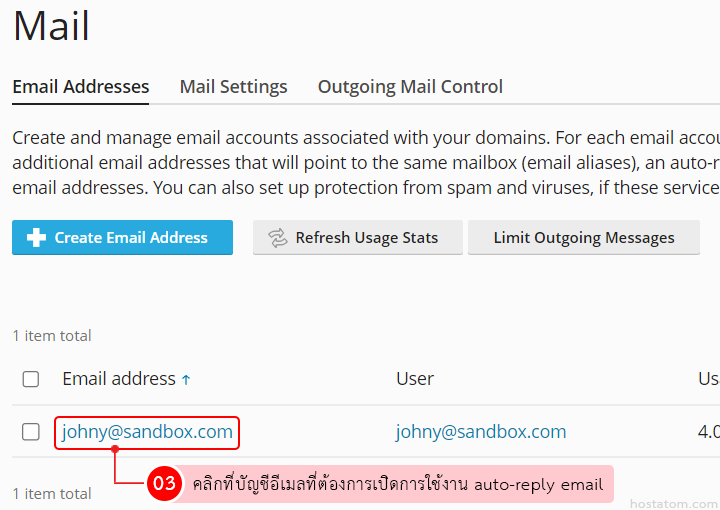
วิธีเปิดการใช้งาน auto-reply email
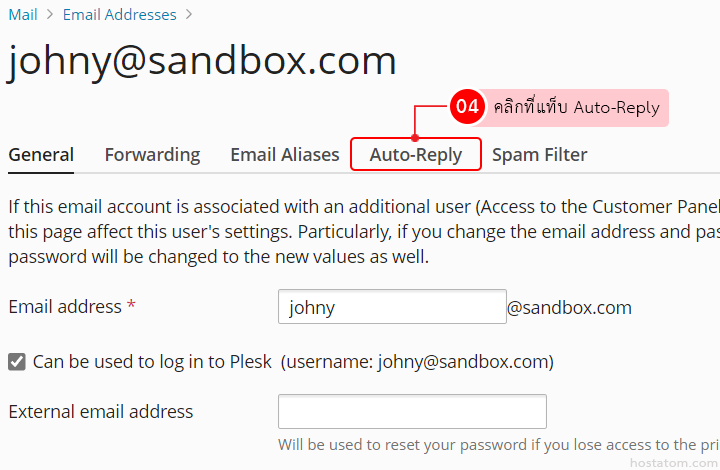
คลิกที่บัญชีอีเมลที่ต้องการเปิดการใช้งาน auto-reply email
คลิกที่แท็บ Auto-Reply
ติ๊กถูกที่ Switch on auto-reply
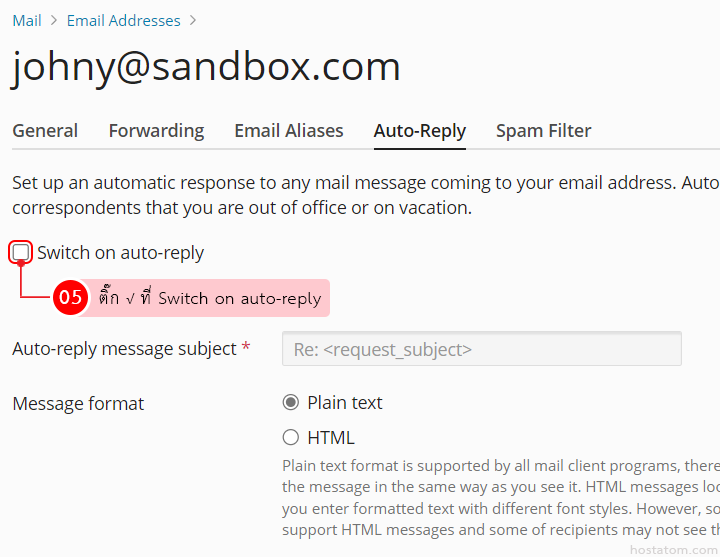
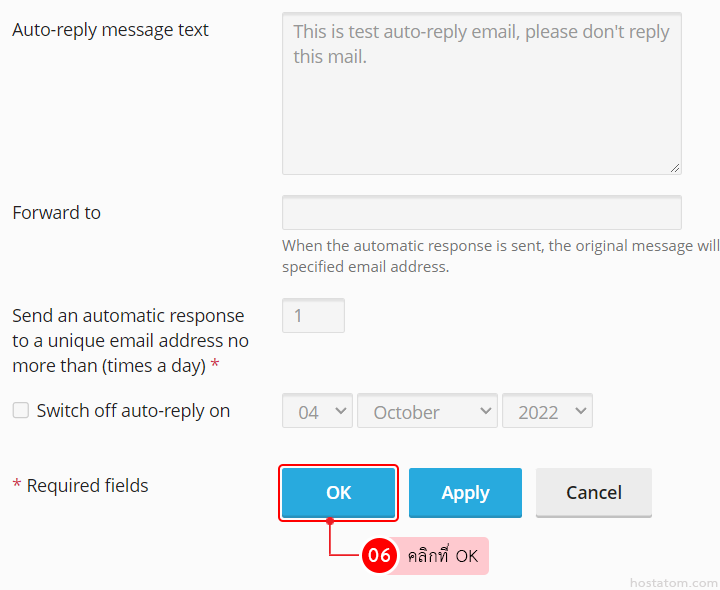
กำหนดรายละเอียดของเมลตอบกลับ เมื่อเสร็จแล้วให้คลิกที่ OK
- Auto-reply message subject – กำหนดหัวเรื่องของเมลตอบกลับ
- Message format – เลือกรูปแบบของเมลตอบกลับ
- Encoding – เลือกรูปแบบการเข้ารหัส (แนะนำให้เลือกเป็น UTF-8 เพราะรองรับการใช้งานภาษาไทยได้)
- Auto-reply message text – กำหนดข้อความที่จะแสดงในเมลตอบกลับ
- Forward to – กำหนดบัญชีอีเมลที่ต้องการส่งต่อ (สามารถใส่ได้เพียง 1 บัญชี)
- Send an automatic response to a unique email address no more than (times a day) – กำหนดจำนวนครั้งที่ให้ส่งเมลตอบกลับไปยังแต่ละอีเมล
- Attach file – แนบไฟล์ที่ต้องการส่ง (ถ้ามี)
- Switch off auto-reply – กำหนดวันที่ต้องการให้หยุดส่งเมลตอบกลับ หากต้องการเปิดการใช้งานให้ติ๊กถูกที่หน้า Switch off auto-reply จากนั้นกำหนดวัน เดือน ปีที่ต้องการ

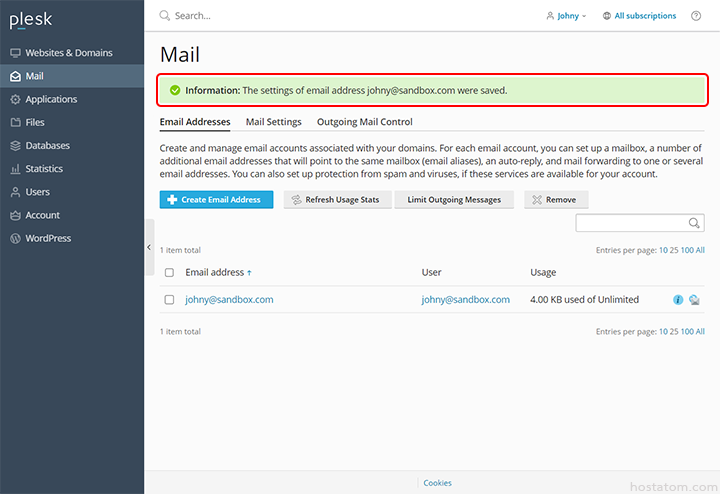
ระบบจะแจ้งว่าการตั้งค่าของอีเมลดังกล่าวได้ถูกบันทึกแล้ว (จะมีข้อความ Auto-reply is switched on. ที่ท้ายบัญชีอีเมล)

วิธีปิดการใช้งาน auto-reply email
คลิกที่บัญชีอีเมลที่ต้องการปิดการใช้งาน auto-reply email
คลิกที่แท็บ Auto-Reply
นำติ๊กถูกหน้าหัวข้อ Switch on auto-reply ออก
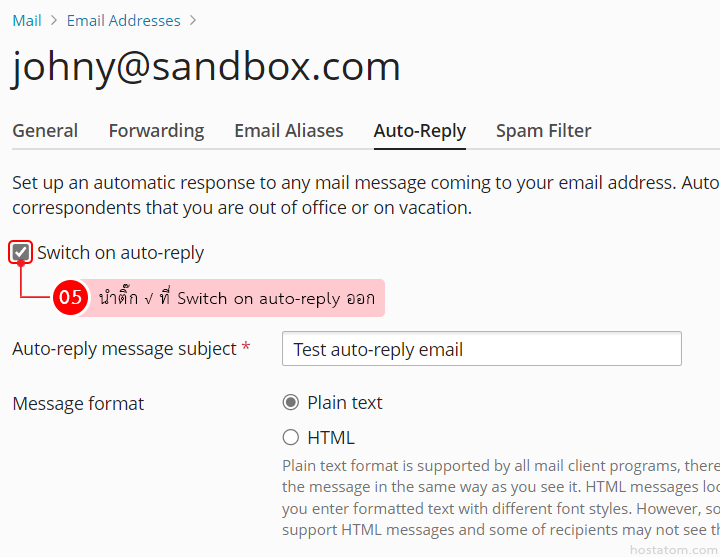
คลิกที่ OK
ระบบจะแจ้งว่าการตั้งค่าของอีเมลดังกล่าวได้ถูกบันทึกแล้ว (ข้อความ Auto-reply is switched on ที่ท้ายบัญชีอีเมลจะหายไป)