ในกรณีที่มี Cloudflare อยู่แล้วและต้องการตั้งค่า DNS Record ของบริการ Microsoft 365 ซึ่งทำได้โดยทำตามขั้นตอนต่อไปนี้
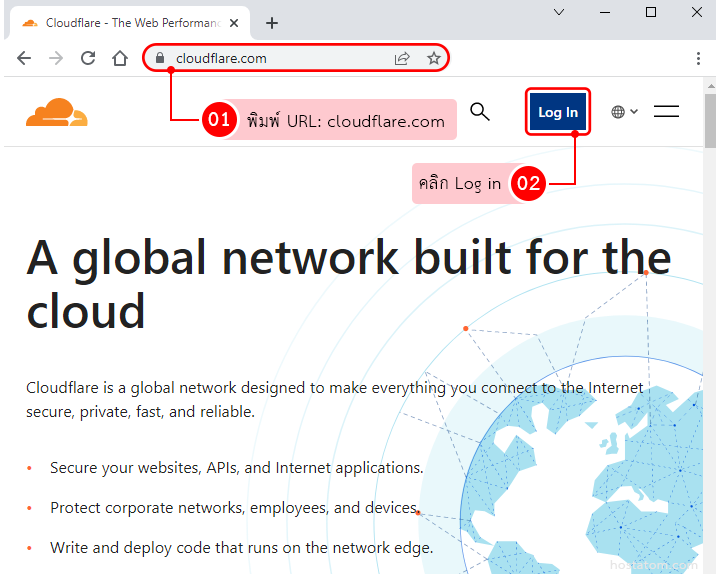
ทำการ Login เข้าสู่ Cloudflare โดยพิมพ์ URL: cloudflare.com => Log In
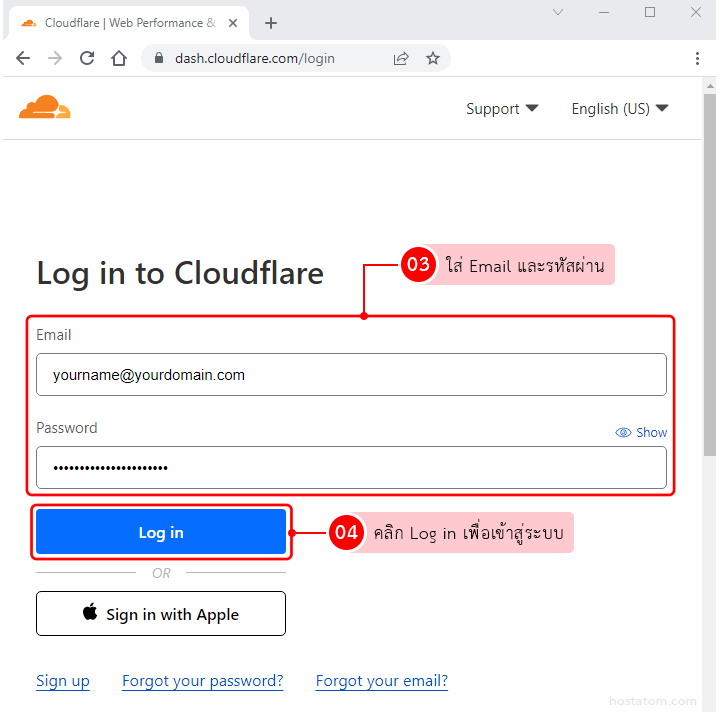
ใส่ บัญชีอีเมลที่ได้ลงทะเบียนไว้กับทาง Cloudlare และ Password จากนั้นคลิก Log in
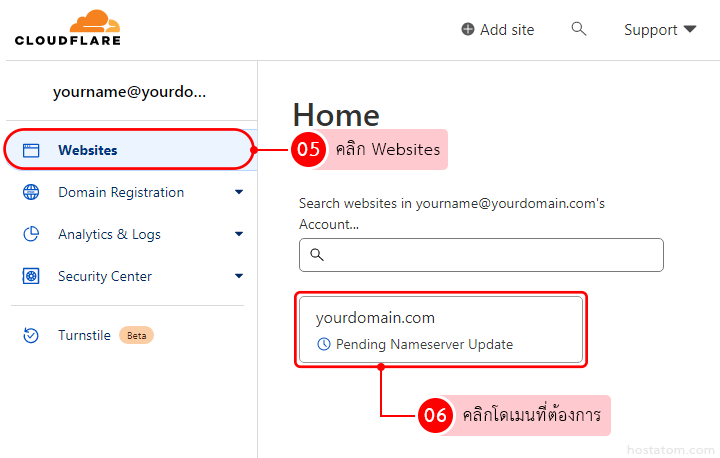
คลิกที่ Websites ระบบจะเข้าสู่หน้า home และจะแสดงรายชื่อโดเมนทั้งหมด ให้คลิกที่โดเมนที่ต้องการตั้งค่า
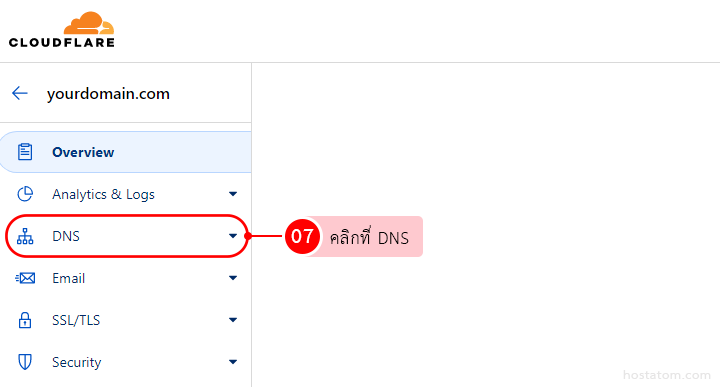
ที่เมนูด้านซ้ายให้คลิกที่ DNS
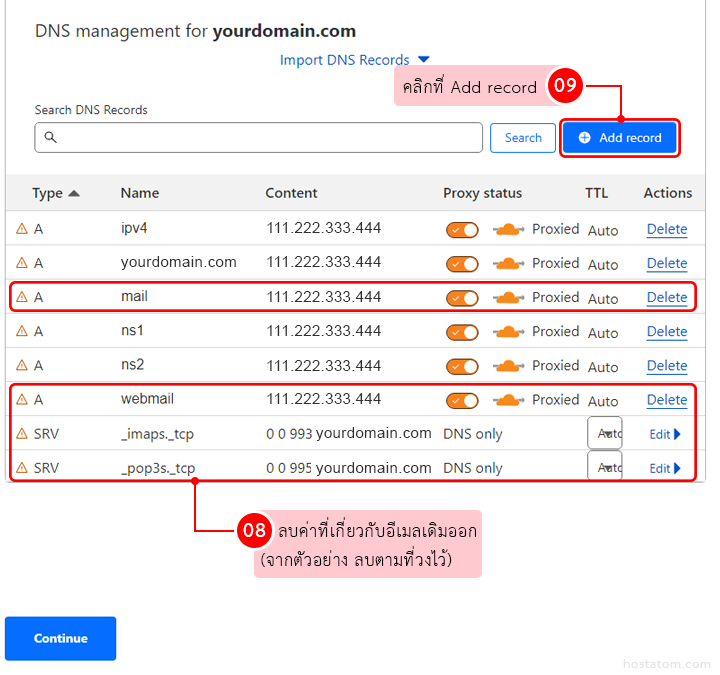
ระบบจะมาหน้าที่ DNS records จากนั้นให้ทำการลบค่าอีเมลเดิมของเก่าทิ้งไป จากนั้นคลิกที่ Add Record เพื่อเพิ่มค่า DNS ของ Microsoft 365 ลงไป
เพิ่มค่า MX และค่า TXT ของ Microsoft 365 โดยมีรายละเอียด ดังนี้
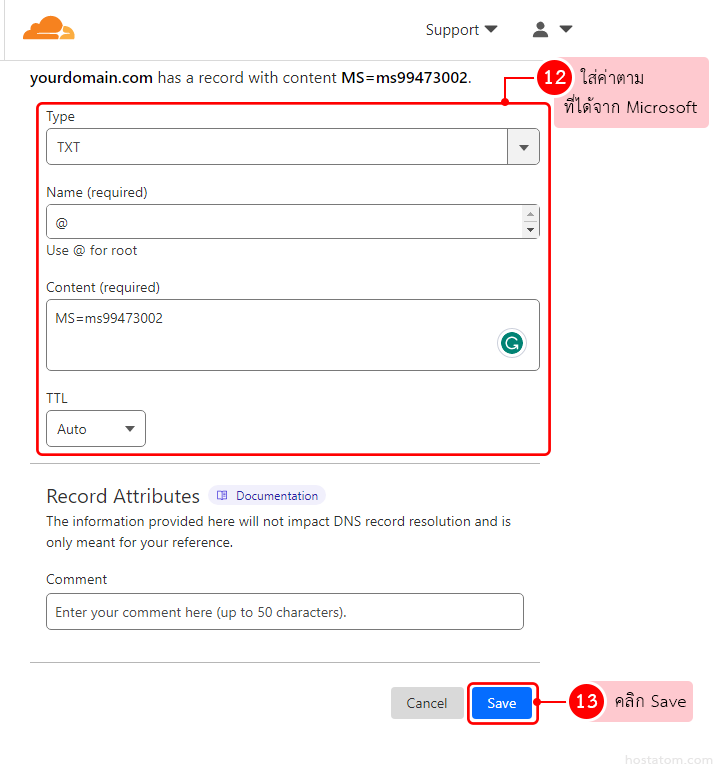
ค่า TXT record เพื่อ verify โดเมน
| Type | Name | Autimatic TTL | Content |
|---|---|---|---|
| TXT | @ | 30 minutes | MS=ms XXXXXXXX |
หมายเหตุ: ค่าใน Content เป็นเพียงค่าตัวอย่าง ซึ่งค่านี้คุณจะได้จากการตั้งค่าโดเมน
ค่า MX Record
| Type | Name | Mail Server | Priority | TTL |
|---|---|---|---|---|
| MX | @ | 1 | 30 minutes |
หมายเหตุ: ค่า domain-key ใน Mail Server เป็นเพียงค่าตัวอย่าง ซึ่งค่านี้คุณจะได้จากการตั้งค่าโดเมน
ค่า CNAME Record
| Type | Name | Target | TTL |
|---|---|---|---|
| CNAME | autodiscover | autodiscover.outlook.com | 30 minutes |
| CNAME | sip | sipdir.online.lync.com | 30 minutes |
| CNAME | lyncdiscover | webdir.online.lync.com | 30 minutes |
| CNAME | enterpriseregistration | enterpriseregistration.windows.net | 30 minutes |
| CNAME | enterpriseenrollment | enterpriseenrollment-s.manage.microsoft.com | 30 minutes |
| CNAME | msoid | clientconfig.microsoftonline-p.net | 30 minutes |
ค่า TXT Record สำหรับ SPF (มีเพื่อป้องกันอีเมลสแปม)
| Type | Name | TTL | Content |
|---|---|---|---|
| TXT | @ | 30 minutes | v=spf1 include:spf.protection.outlook.com -all |
ค่า SRV Record
| Type | Service | Ptotocol | Name | TTL | Priority | Weight | Port | Target |
|---|---|---|---|---|---|---|---|---|
| SRV | _sip | TLS | yourdomain.com | 30 minutes | 100 | 1 | 443 | sipfed.online.lync.com |
| SRV | _sipfederationtls | TCP | yourdomain.com | 30 minutes | 100 | 1 | 5061 | sipfed.online.lync.com |
ทำการเพิ่มค่า DNS ของ Microsoft 365 ด้านบนลงทีละค่า เมื่อใส่เสร็จค่านึงแล้วให้กดปุ่ม Save
จากนั้นคลิกที่ Add Record เพื่อเพิ่มค่าอื่นๆ ต่อไป ทำแบบนี้วนไปเรื่อยๆ จนครบ
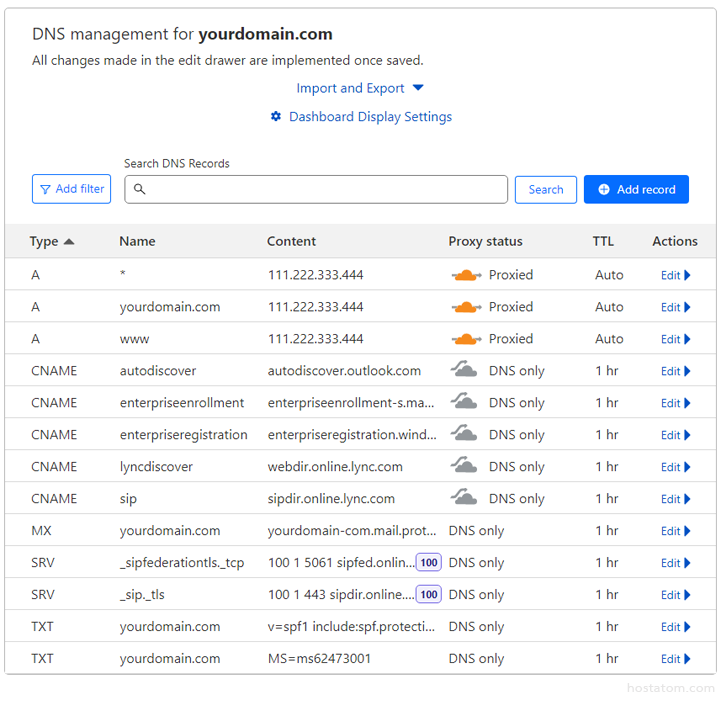
เมื่อตั้งค่าเรียบร้อยแล้ว จะแสดงรายละเอียด ดังภาพ