![enable-auto-update-plugins-wordpress-720x350-1 - hostatom Knowledge Base](https://kb.hostatom.com/wp-content/uploads/2024/05/enable-auto-update-plugins-wordpress-720x350-1.jpg)
สำหรับผู้ที่ใช้งาน WordPress สามารถกลับมาเปิดใช้งาน auto-update ให้กับปลั๊กอินที่เคยปิด auto-update ไว้ได้ตามขั้นตอน
ต่อไปนี้
เริ่มจากลงชื่อเข้าใช้งานเว็บไซต์ WordPress ที่ต้องการเปิดใช้งาน auto-update ให้กับปลั๊กอิน
![20220308001 - hostatom Knowledge Base](https://kb.hostatom.com/wp-content/uploads/2017/09/20220308001.png)
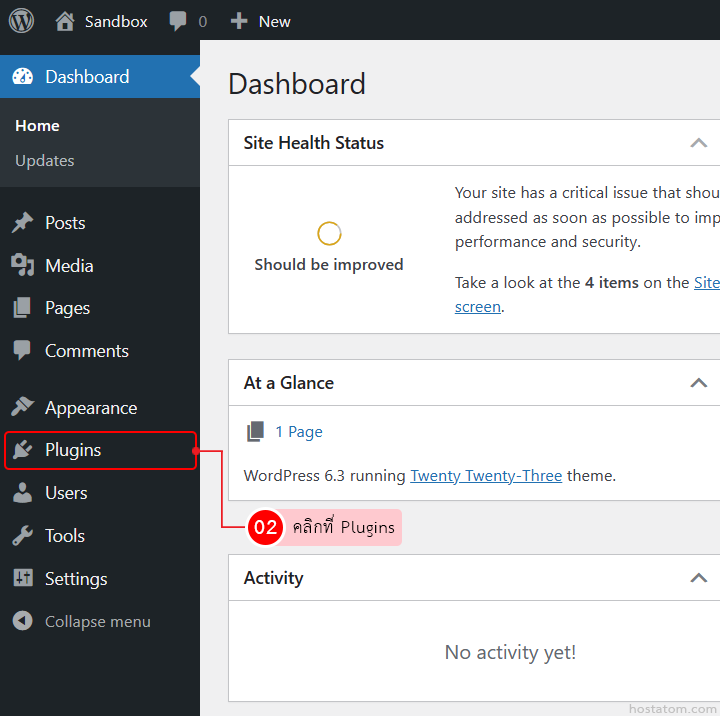
คลิกที่ Plugins
![20230816001 - hostatom Knowledge Base](https://kb.hostatom.com/wp-content/uploads/2024/04/20230816001.png)
กรณีเลือกเปิดใช้งาน auto-update ทีละปลั๊กอิน
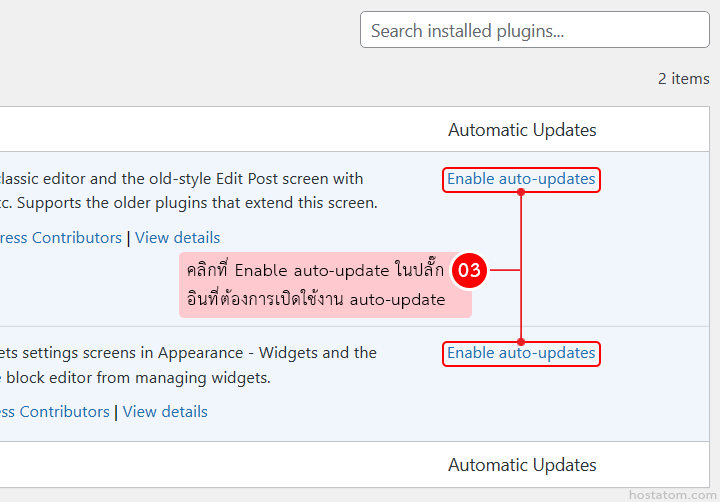
คลิกที่ Enable auto-updates ที่ปลั๊กอินที่ต้องการเปิดใช้งาน auto-update
![20230817001 - hostatom Knowledge Base](https://kb.hostatom.com/wp-content/uploads/2024/04/20230817001.png)
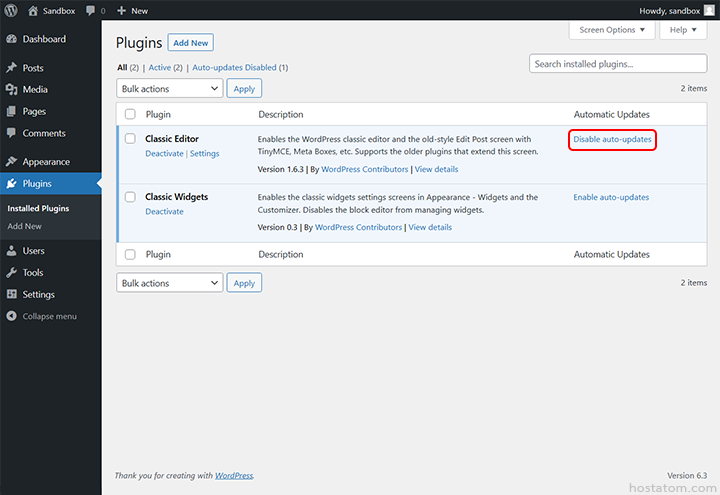
ระบบจะแจ้งว่าได้เปิดใช้งาน auto update ของปลั๊กอินดังกล่าวแล้ว โดยที่หัวข้อ Automatic Updates ของปลั๊กอินดังกล่าวจะเปลี่ยนเป็น Disable auto-updates ดังภาพตัวอย่าง
![20230817002 - hostatom Knowledge Base](https://kb.hostatom.com/wp-content/uploads/2024/04/20230817002.png)
กรณีเลือกเปิดใช้งาน auto-update ทีละหลายปลั๊กอิน
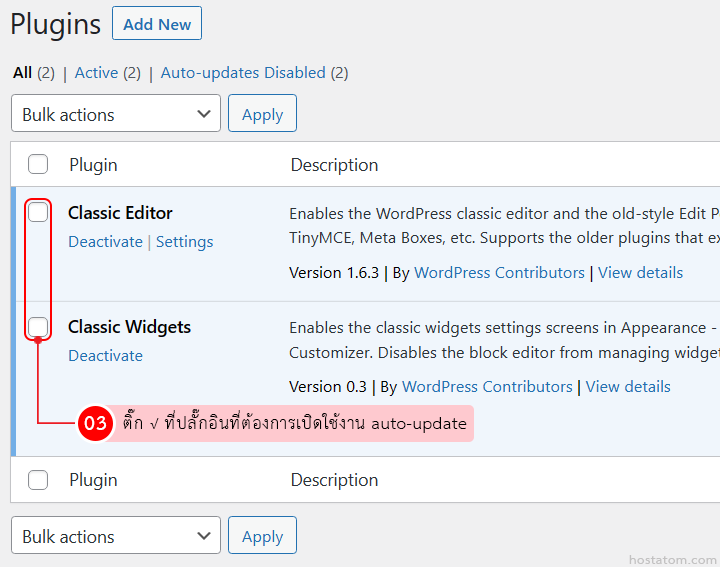
ติ๊กถูกที่ปลั๊กอินที่ต้องการเปิดใช้งาน auto-update
![20230817003 - hostatom Knowledge Base](https://kb.hostatom.com/wp-content/uploads/2024/04/20230817003.png)
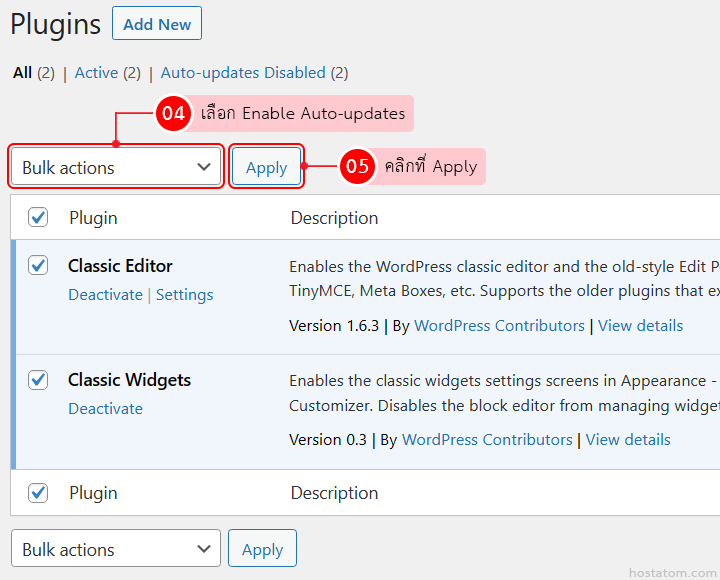
เลือก action เป็น Enable Auto-updates จากนั้นคลิกที่ Apply
![20230817004 - hostatom Knowledge Base](https://kb.hostatom.com/wp-content/uploads/2024/04/20230817004.png)
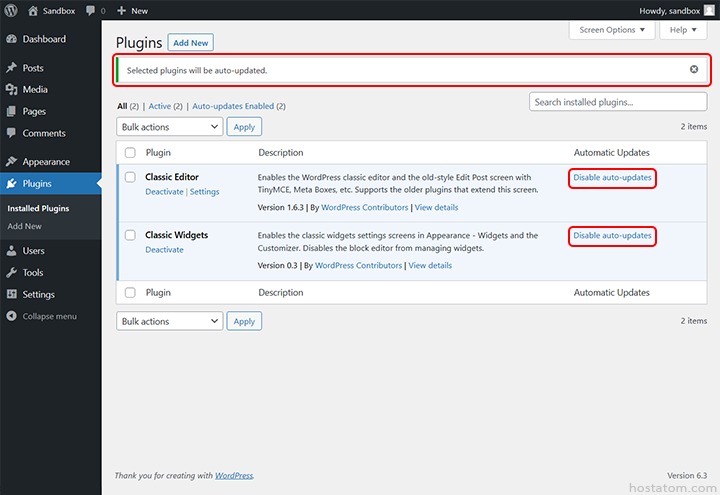
ระบบจะแจ้งว่าได้เปิดใช้งาน auto update ของปลั๊กอินที่เลือกแล้ว โดยที่หัวข้อ Automatic Updates ของปลั๊กอินดังกล่าวจะเปลี่ยนเป็น Disable auto-updates ดังภาพตัวอย่าง
![20230817005 - hostatom Knowledge Base](https://kb.hostatom.com/wp-content/uploads/2024/04/20230817005.png)