ในการโอนย้ายข้อมูลอีเมลจาก Google Workspace มายัง Microsoft 365 สามารถทำได้โดยใช้วิธี IMAP ซึ่งการที่จะทำวิธีการนี้ได้นั้นจะต้องมีการเปิดใช้งาน IMAP ที่ Google Workspace ก่อน
ซึ่งก่อนที่จะทำการโอนย้ายนั้น จะต้องรู้และเตรียมอะไรบ้างมาดูกันเลย
- เปิด Less Secure App โดย
- ผู้ดูแลระบบ Google Workspace จะต้องไปเปิดที่ Admin Console ก่อน โดยดูขั้นตอนการเปิดได้ที่ วิธีการตั้งค่าอนุญาตให้ผู้ใช้เข้าถึง Less secure apps ใน Admin Console
- ผู้ใช้งานบริการ Google Workspace แต่ละบัญชีต้องไปเปิด Less Secure App ของตัวเอง โดยดูขั้นตอนการทำได้ที่ วิธีการเปิด-ปิด Allow less secure apps
- ผู้ใช้งาน Google Workspace แต่ละบัญชีต้องไปสร้าง Apps Password โดยดูขั้นตอนการทำได้ที่ การสร้างรหัสผ่าน Apps Passwords สำหรับ Google Account
- การโอนย้ายข้อมูลจะได้เฉพาะข้อมูลอีเมลและอีเมลในโฟลเดอร์เท่านั้น Contact และ calendar จะไม่สามารถโอนย้ายได้
- จำนวนอีเมลที่โอนย้ายได้สูงสุดคือ 500,000 เมล โดยจะเรียงจากใหม่สุดไปเก่า
- ขนาดอีเมลใหญ่สุดต้องไม่เกิน 35 GB
- การโอนย้ายข้อมูลอีเมลจะต้องมี username และรหัสผ่านบัญชี Google ทุกบัญชี
- ต้องมีการสร้างบัญชีอีเมลที่ Microsoft 365 และเพิ่ม License เรียบร้อยแล้ว
อ้างอิงข้อมูล – What you need to know about migrating your IMAP mailboxes to Microsoft 365 or Office 365
พอเตรียมข้อมูลเรียบร้อยแล้วก็มาเริ่มทำการโอนย้ายข้อมูลอีเมลกันเลย
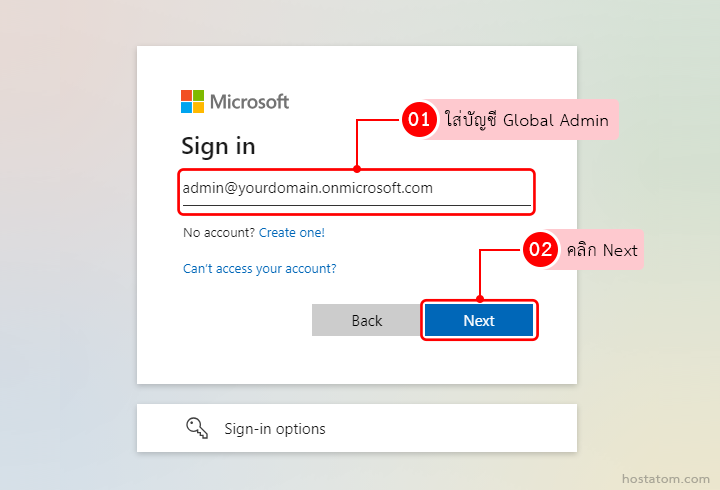
เริ่มจากทำการ Login เข้าสู่ Microsoft 365 Admin Center โดยใช้บัญชี Global Admin หรือบัญชีแอดมินระดับสูงสุด จากนั้นคลิกที่ปุ่ม Next
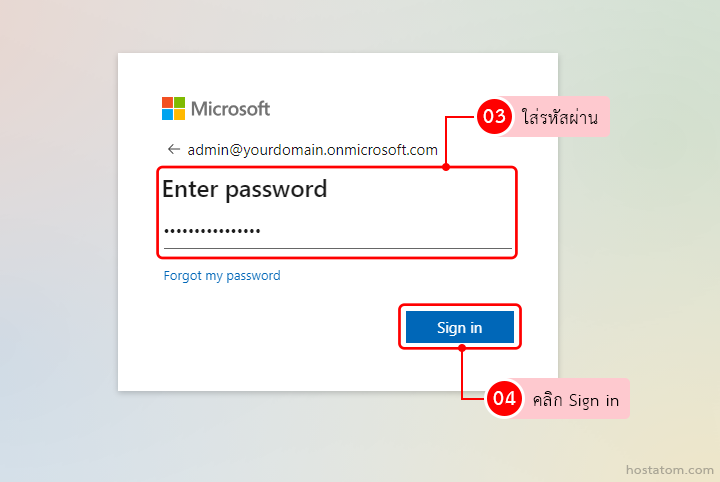
ใส่รหัสผ่าน จากนั้นคลิกที่ Sign in
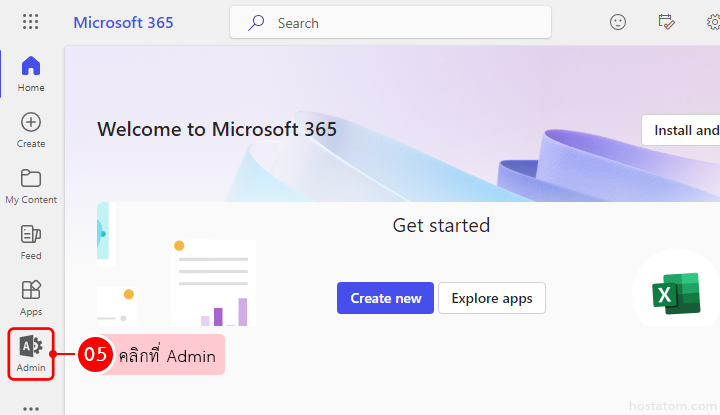
ในส่วน Microsoft 365 Admin Center ที่เมนูด้านซ้าย คลิกที่ icon “Admin” ![]()
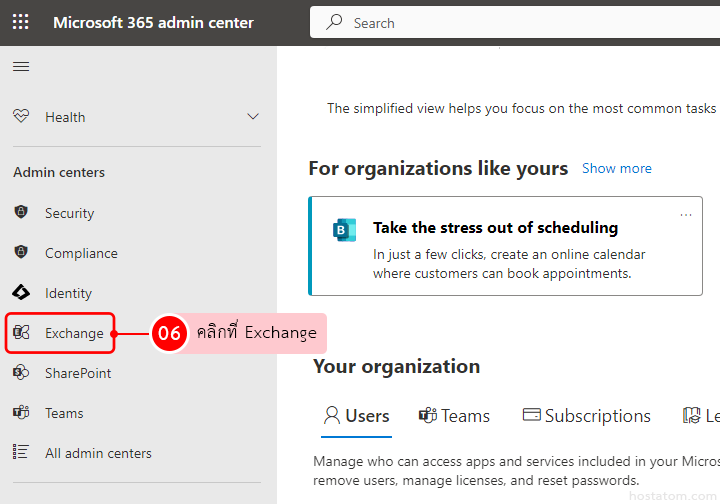
ที่เมนูด้านซ้าย คลิกที่ Exchange
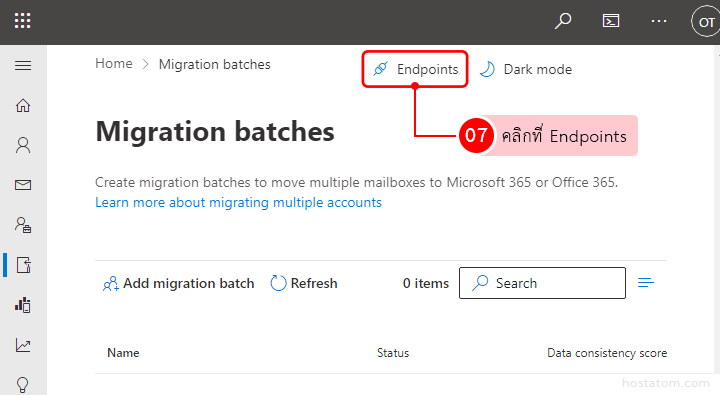
ทำการสร้าง Endpoints ก่อน โดยคลิกที่ “Endpoints” ดังภาพ
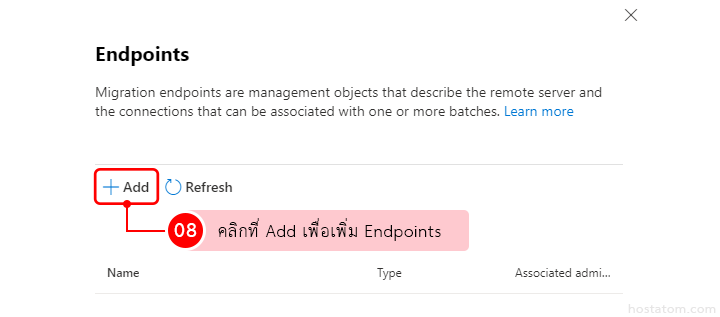
คลิกที่ “+Add” เพื่อทำการเพิ่ม Endpoints
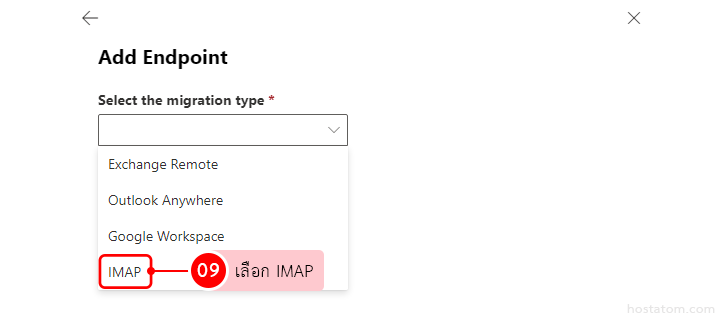
ใน Add Enpoint ที่ Select the migration type เลือก “IMAP”
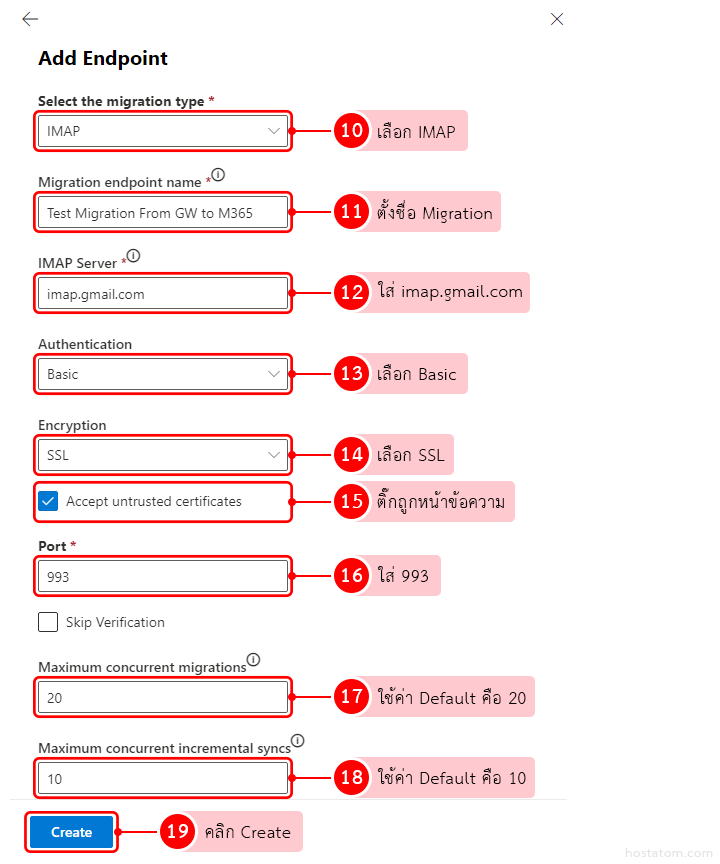
จากนั้นให้เลือก และใส่ข้อมูลตามภาพด้านล่างนี้ เมื่อเรียบร้อยแล้ว คลิกที่ Create
ระบบจะทำการสร้าง Endpoint

หากการสร้างสำเร็จ ระบบจะแสดงข้อความ ดังภาพ

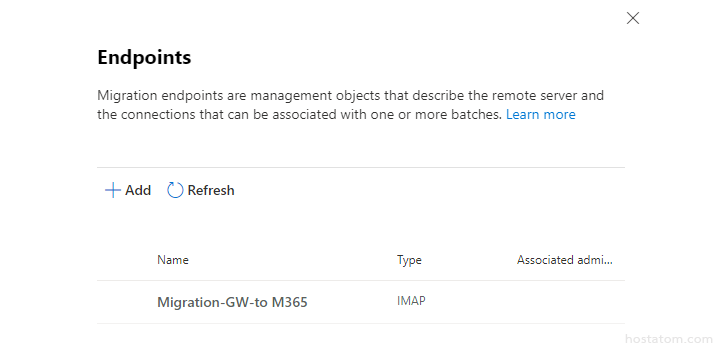
Endpoint ที่เราสร้างจะปรากฎ ดังภาพๆ
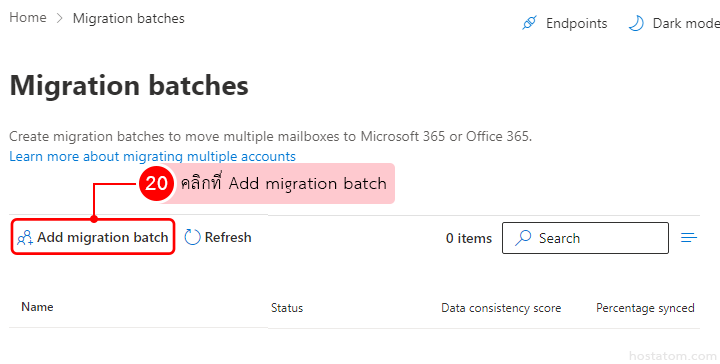
จากนั้นเริ่มทำการสร้าง Migration โดยคลิกที่ “Add migratin batch”
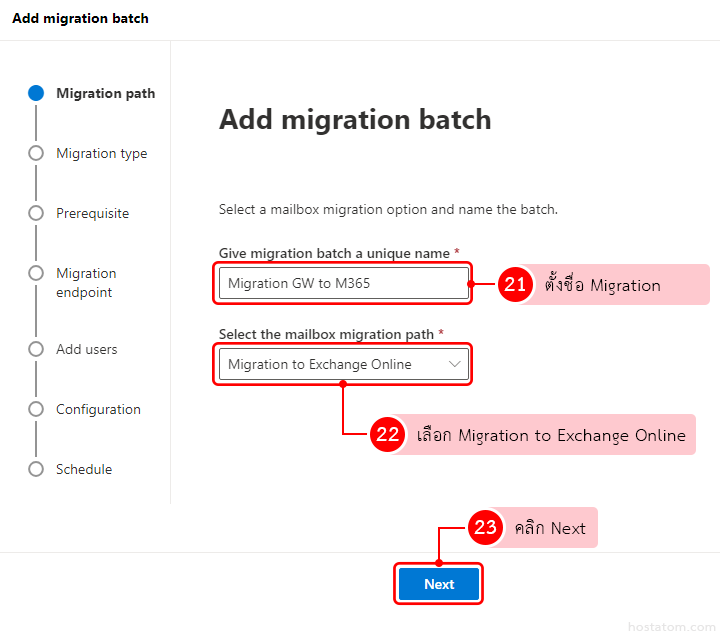
ในขั้นตอน Add Migration batch จะแบ่งออกเป็น 7 ขั้นตอน
ขั้นที่ 1 – Migration patch
จะเป็นการเลือกกล่องอีเมลที่ต้องการโอนย้าย โดยมีรายละเอียด ดังนี้
- Give migration batch a unique name – ตั้งชื่อ Migration ในบทความนี้จะขอตั้งชื่อว่า “Migration GW to M365”
- Select the mailbox migration path – เลือก mailbox ให้เลือก “Migration to Exchange Online”
จากนั้นคลิกปุ่ม Next
ขั้นที่ 2 – Migration Type
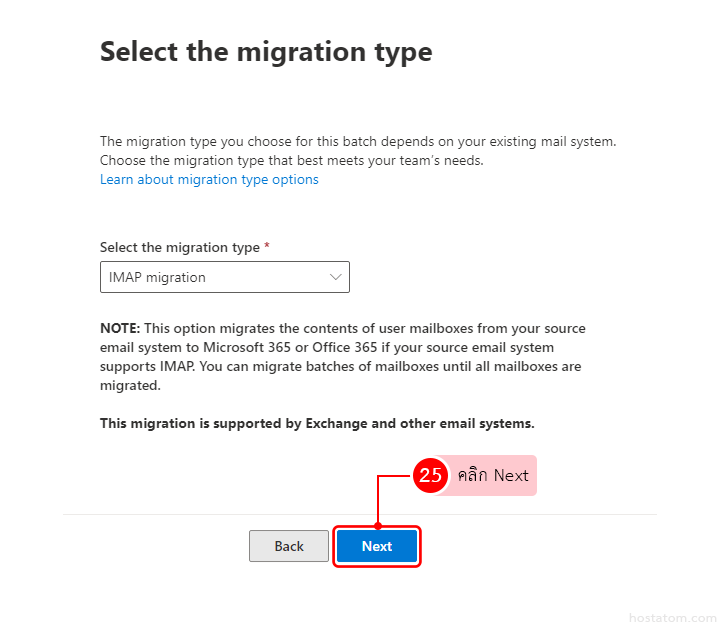
ขั้นนี้จะเป็นการเลือกชนิดของ migration ซึ่งใน Select the migration type ให้เลือกเป็น “IMAP migration”
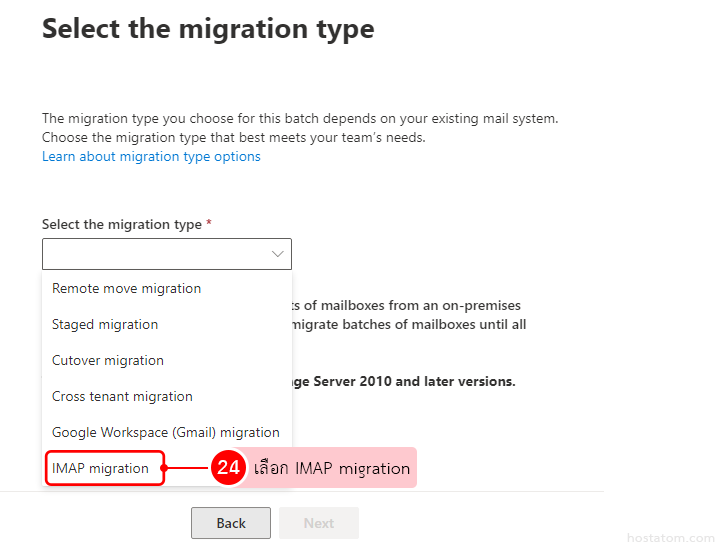
จากนั้นคลิก Next
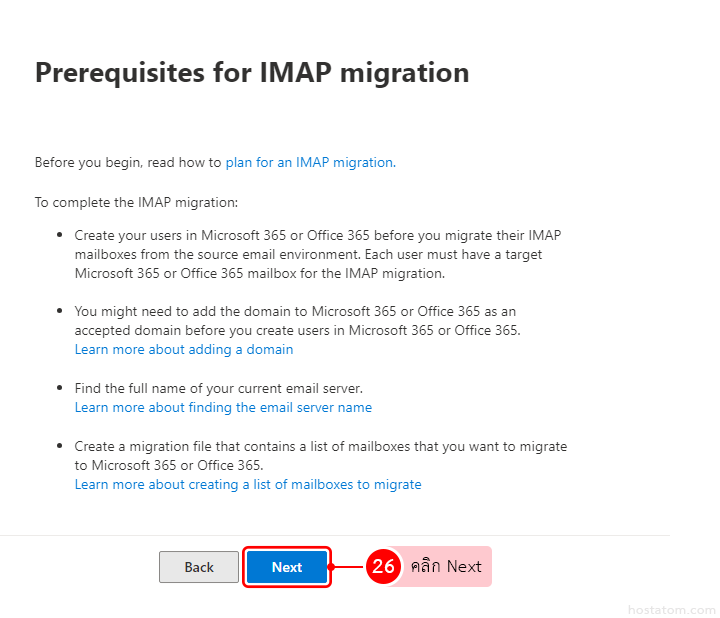
ขั้นที่ 3 – Prerequisites
ก่อนที่จะเริ่มทำการ Migration ด้วย IMAP Migration จะต้องมีการเตรียมดังนี้
- ต้องสร้างบัญชีผู้ใช้ Microsoft 365 และมีการเพิ่ม License ให้บัญชีเรียบร้อยแล้ว
- มีการเพิ่มโดเมนลงใน Microsoft 365 และมีการ Verify กับตั้งค่า DNS ไปยัง Microsoft เรียบร้อยแล้ว
- มี name server ของอีเมลแล้ว
- สร้าง migration file (ชื่อบัญชีอีเมล) เพราะต้องใช้ในการ Migration ด้วย
หากมีการเตรียมตามรายการข้างบนครบแล้วให้คลิกที่ปุ่ม Nex
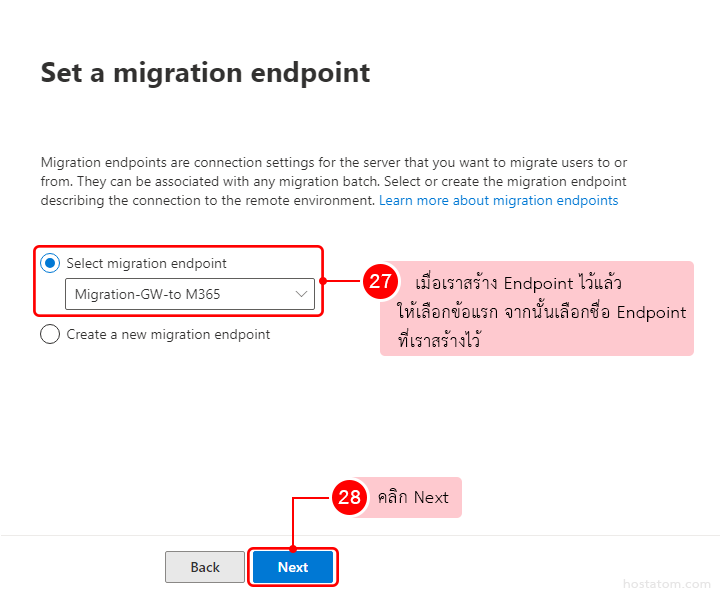
ขั้นที่ 4 – Set a migration endpoint
เลือก Endpoint ซึ่งในขั้นตอนแรกๆ เราได้สร้าง Endpoint ไว้แล้ว ดัังนั้นให้เลือกข้อ 1 “Select migration endpoint” แล้วเลือกชื่อ Migration ที่เราสร้างไว้ จากนั้นให้คลิก Next
ขั้นที่ 5 – Add user
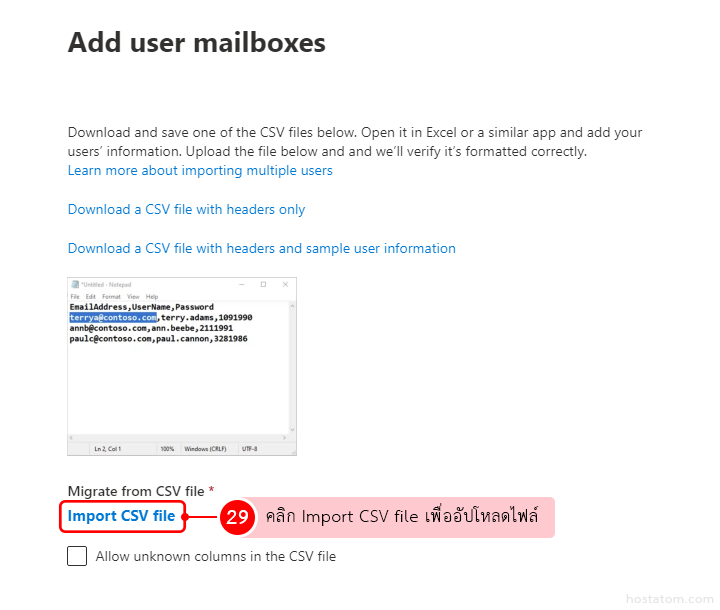
ทำการเพิ่มบัญชีอีเมล (บัญชีผู้ใช้งาน Google) โดยไฟล์ที่จะอัปโหลดขึ้นไปจะต้องเป็นไฟล์ CSV ซึ่งอาจไปสร้างใน Google Sheet หรือ Excel ก็ได้ โดยมีรายละเอียด ดังนี้
- EmailAddress (Column A) – อีเมลของผู้ใช้ใน Microsoft 365
- UserName (Column B) – อีเมลของผู้ใช้ใน Google
- Password (Column C) – รหัสผ่านของผู้ใช้ (บัญชี Google)
เมื่อเสร็จเรียบร้อยแล้วให้บันทึกไฟล์เป็นนามสกุล CSV

กลับมาที่ Microsoft 365 Admin Center ให้คลิกที่ Import CSV file
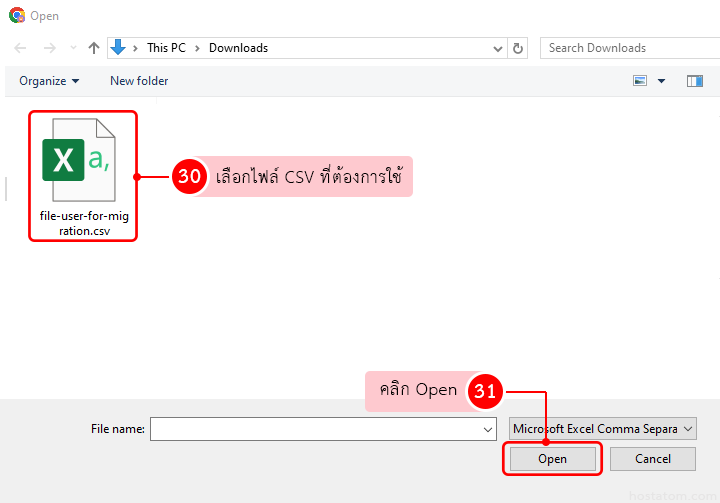
เลือกไฟล์ CSV ที่ต้องการอัปโหลด จากนั้นคลิก Open
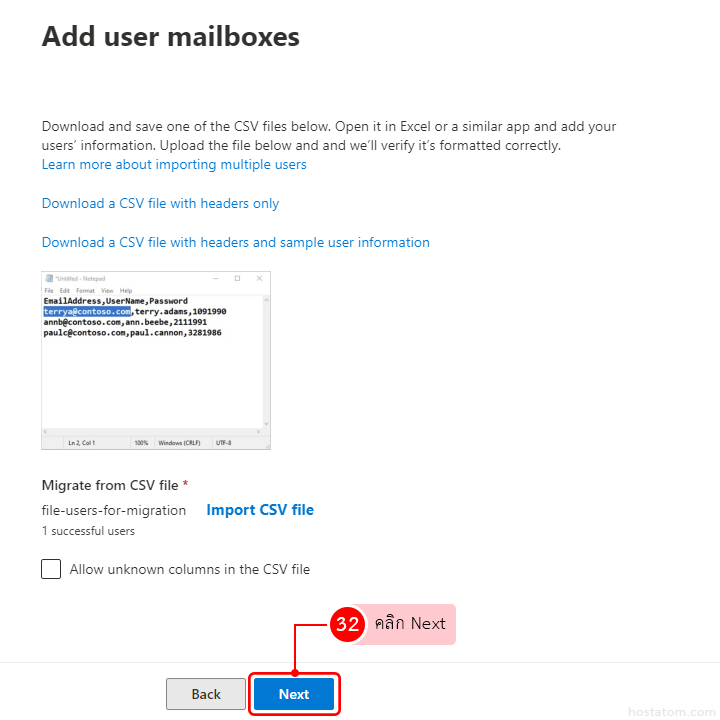
เมื่ออัปโหลดไฟล์เรียบร้อยแล้ว ให้คลิกที่ Next
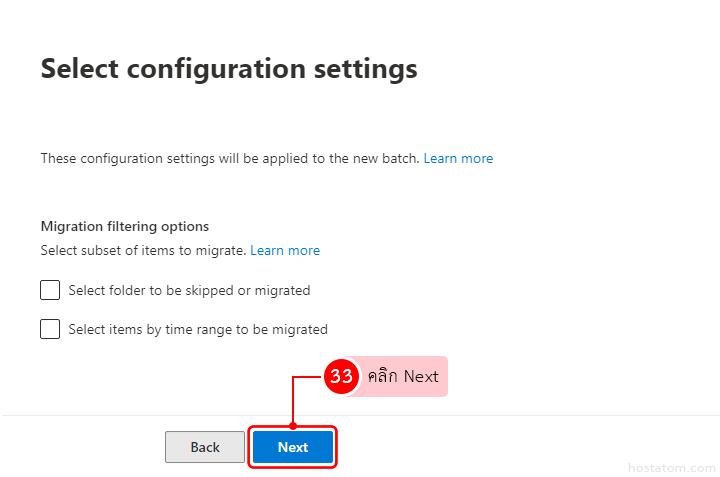
ขั้นที่ 6 – Configuration
ในขั้นตอนนี้ไม่ต้องดำเนินการใดๆ ให้คลิก Next ได้เลย
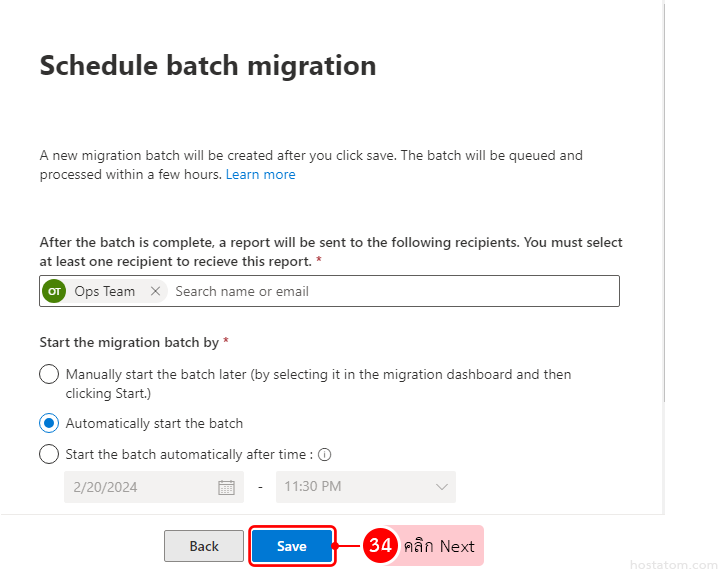
ขั้นที่ 7 – Schedule
ขั้นสุดท้ายนี้เป็นการกำหนดวันและเวลาที่เริ่มกระบวนการ Migration หากต้องการโอนย้ายเลยให่เลือก Automatically start the batch จากน้นให้คลิก Next
ระบบจะแสดงข้อความแจ้งว่ากำลังเริ่มสร้างการ Migration

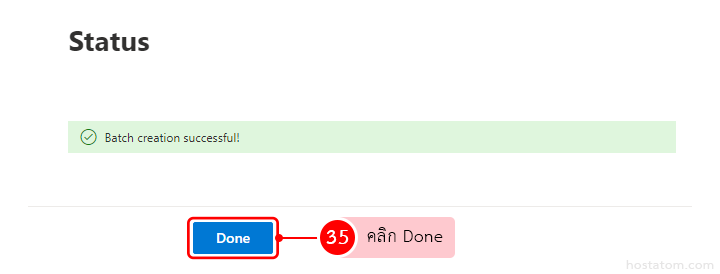
เมื่ออกระบวนสร้างเสร็จแล้วระบบจะแสดงข้อความตามภาพ ให้คลิก Done
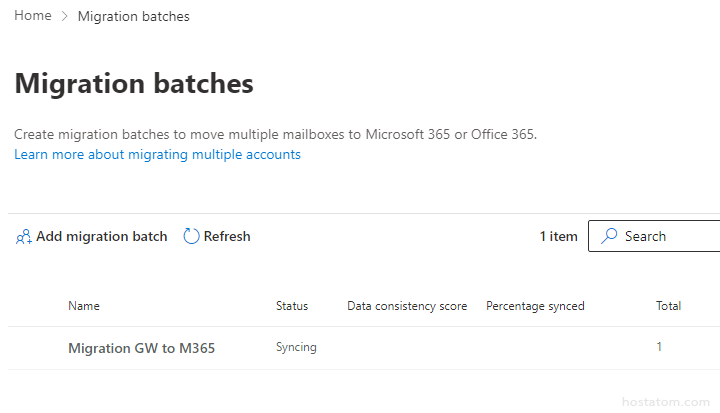
ระบบจะเริ่มกระบวนการ Migration ดังภาพ
