สำหรับใครที่ใช้งานอีเมลบน Plesk อยู่ อาจเคยเจอปัญหาคนส่งอีเมลผิด หรือผู้ส่งมีการกดส่งอีเมลไปยังผู้ใช้ที่ไม่มีอยู่จริงในโดเมนนั้น ๆ
จริง ๆ แล้ว Plesk สามารถตั้งค่าการรับเมลที่ส่งผิดชื่อเหล่านี้ได้ โดยสามารถทำได้ 2 วิธีตามขั้นตอนต่อไปนี้
วิธีที่ 1
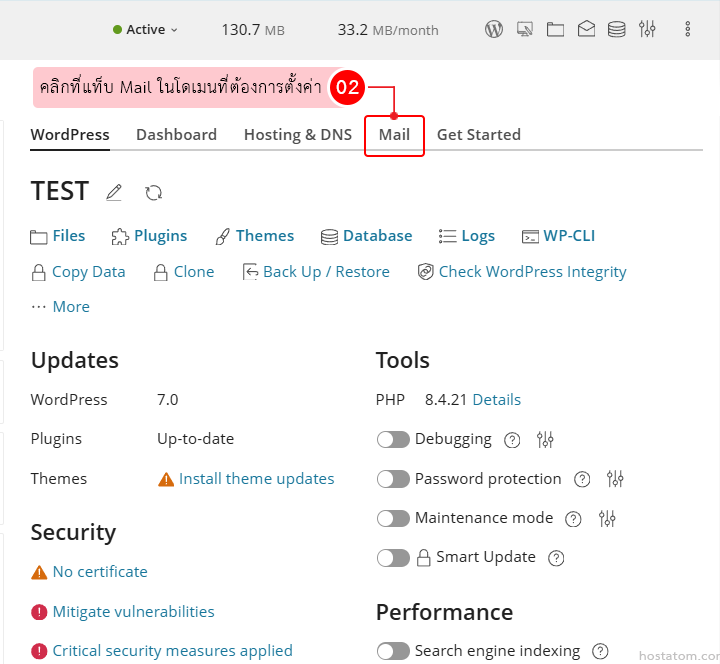
คลิกที่แท็บ Mail ในโดเมนที่ต้องการตั้งค่า
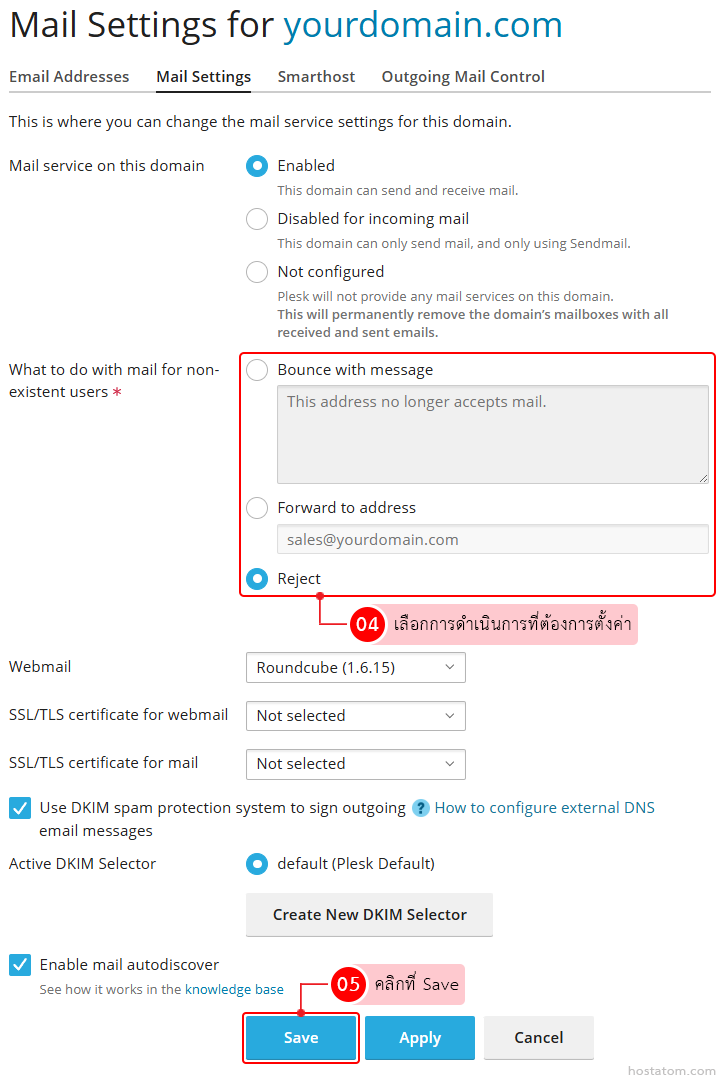
เลือกการดำเนินการที่ต้องการตั้งค่าในหัวข้อ What to do with mail for non-existent users
- Bounce with message ตีกลับเมลดังกล่าวพร้อมข้อความที่กำหนด
- Forward to address ส่งต่อเมลที่ได้ไปยังอีเมลที่เป็นของโดเมนที่เลือก (ซึ่งเฉพาะผู้ดูแลระบบเท่านั้นที่สามารถระบุอีเมลภายนอกหรือใช้อีเมลเดียวสำหรับหลายโดเมนได้)
- Reject ปฏิเสธเมลที่ส่งมา (ค่าเริ่มต้น)
โดยในคู่มือนี้ เราจะใช้ตัวเลือก Forward to address พร้อมใส่โดเมนที่ต้องการเพื่อใช้รับเมลที่ถูกส่งมายังผู้ใช้ที่ไม่มีอยู่จริง จากนั้นคลิกที่ Save
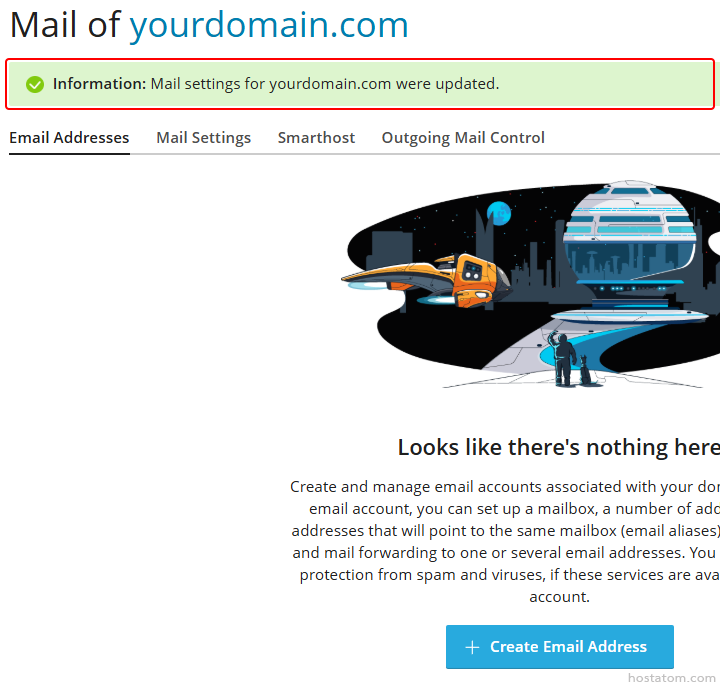
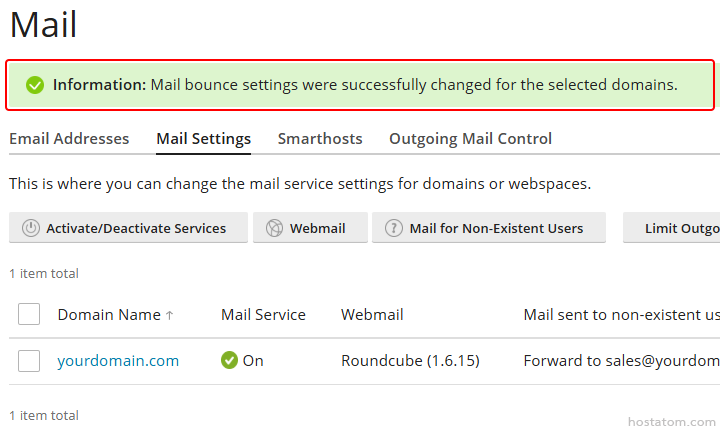
ระบบจะแจ้งว่าได้อัปเดตการตั้งค่าเมลของโดเมนดังกล่าวแล้ว
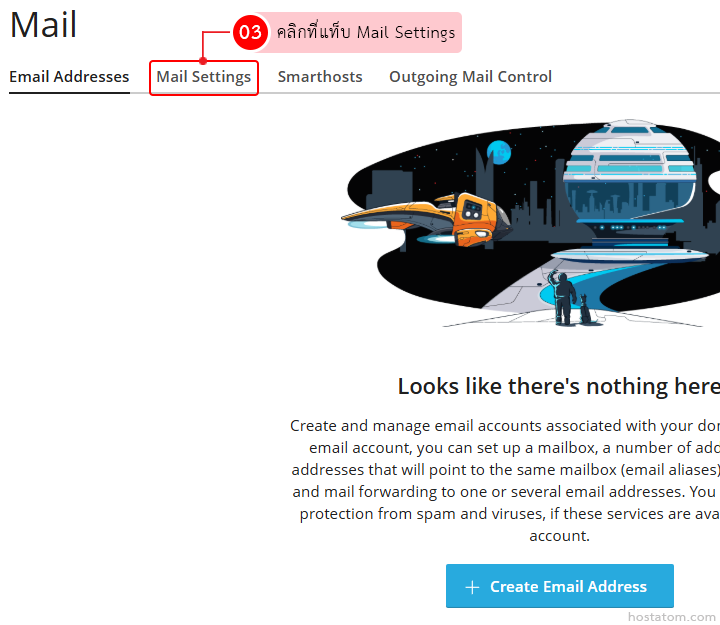
วิธีที่ 2
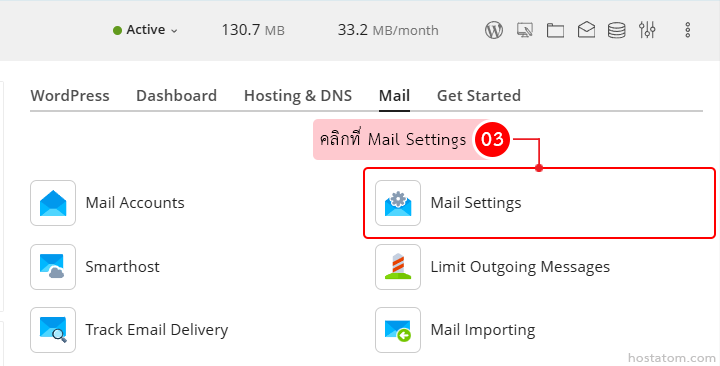
คลิกที่แท็บ Mail Settings
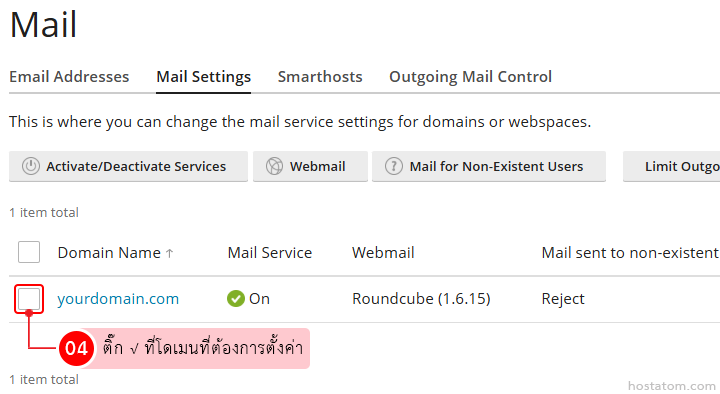
ติ๊ก √ ที่โดเมนที่ต้องการตั้งค่า
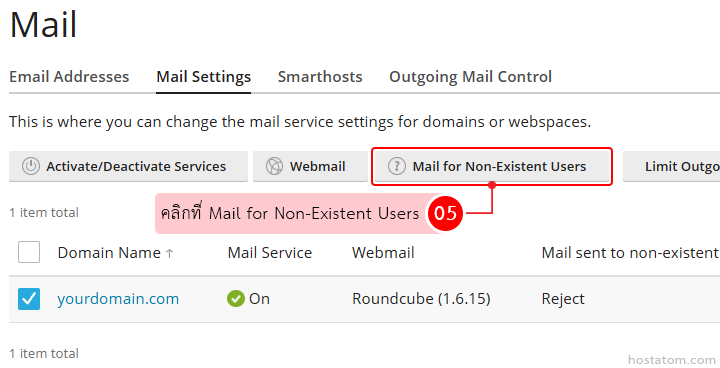
คลิกที่ Mail for Non-Existent Users
ระบบจะแสดงหน้าต่างตั้งค่าการส่งเมลของโดเมนที่เลือกขึ้นมา ให้เลือกการดำเนินการที่ต้องการตั้งค่าในหัวข้อ What to do with mail for non-existent users จากนั้นคลิกที่ OK
- Bounce with message ตีกลับเมลดังกล่าวพร้อมข้อความที่กำหนด
- Forward to address ส่งต่อเมลที่ได้ไปยังอีเมลที่เป็นของโดเมนที่เลือก (ซึ่งเฉพาะผู้ดูแลระบบเท่านั้นที่สามารถระบุอีเมลภายนอกหรือใช้อีเมลเดียวสำหรับหลายโดเมนได้)
- Reject ปฏิเสธเมลที่ส่งมา (ค่าเริ่มต้น)
ระบบจะแจ้งว่าได้อัปเดตการตั้งค่าเมลของโดเมนที่เลือกแล้ว