ในการตั้งค่า Microsoft Office Outlook 2007 นี้เราจะขอใช้การตั้งค่าที่สำคัญดังต่อไปนี้ เพื่ออ้างอิงการตั้งค่า Email กรุณาแทนค่า your ด้วยชื่อ username ของคุณ และแทนค่า yourdomain.com ด้วยโดเมนของคุณ
Email: your@yourdomain.com
Incoming (POP) server: mail.yourdomain.com
Outgoing (SMTP) server: mail.yourdomain.com
Account / User Name: your@yourdomain.com
SMTP Port: 587
1. คลิกที่ไอคอน Microsoft Office Outlook 2007
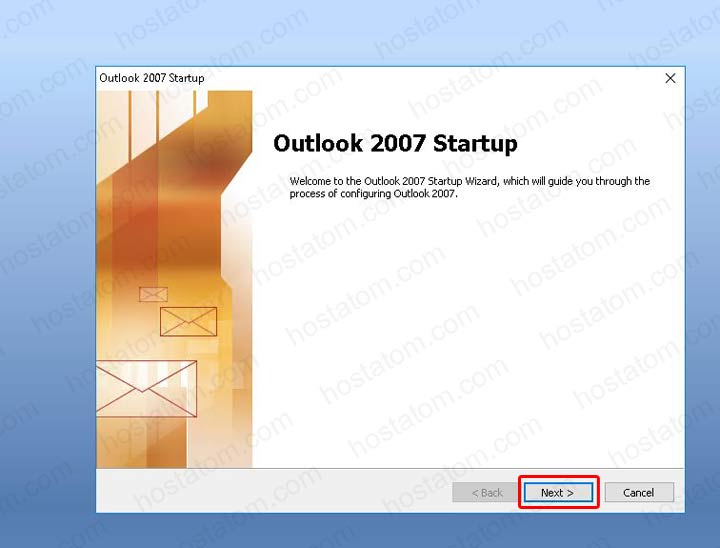
2. เข้าสู่โปรแกรม Microsoft Office Outlook 2007 ให้กดปุ่ม Next
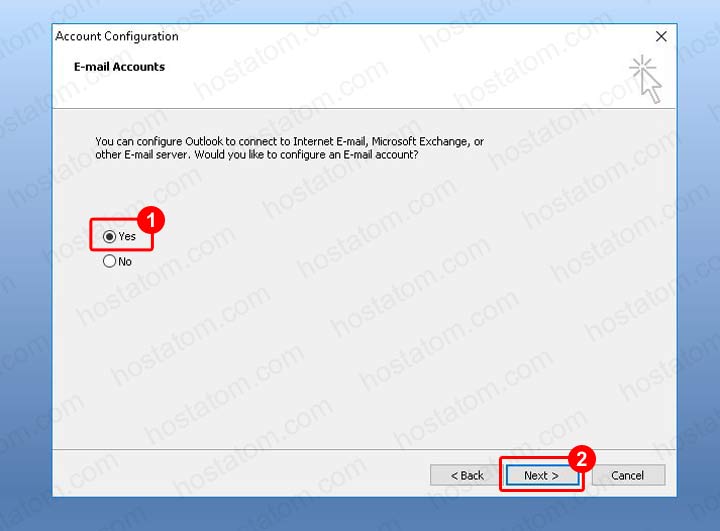
3. ระบบจะทำการถามเพื่อกำหนดค่าของ E-mail ว่าต้องการหรือไม่ ถ้าต้องการให้เลือก Yes แต่ถ้าไม่ต้องการให้เลือก No ในที่นี้ให้เลือกกด Yes เพื่อทำการตั้งค่าของ E-mail จากนั้นกดปุ่ม Next
4. กรอกรายละเอียดต่อไปนี้
- Your Name : กรอกชื่อผู้ใช้
- E-mail Address : กรอก E-mail ของผู้ใช้งาน
- Password : ใส่รหัส Password
- Retype Password : กรอกรหัสผ่านอีกครั้ง
จากนั้นให้คลิกเครื่องหมายถูกที่ Manually configure sever settings or additional server types กดปุ่ม Next

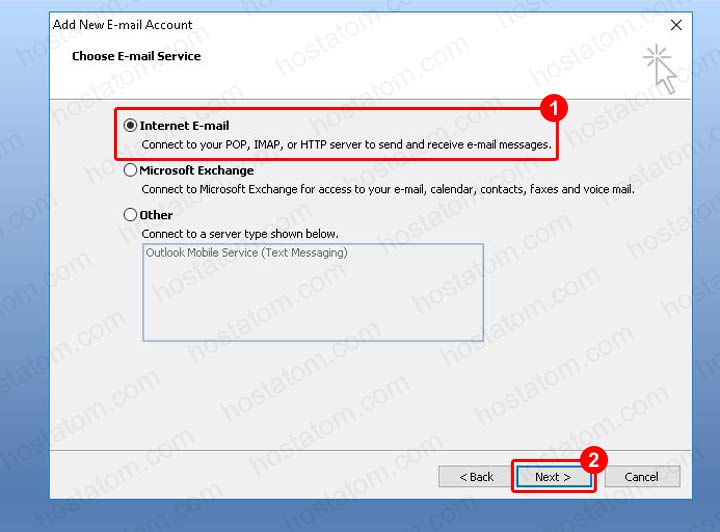
5. เลือกบริการ E-mail Service เลือก Internet E-mail
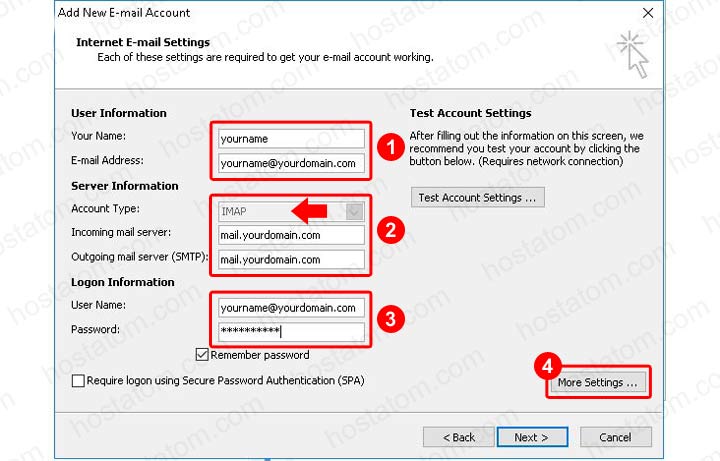
6. กรอกข้อมูล ดังนี้
User Information :
- Your Name: ใส่ชื่อผู้ใช้
- E-mail Address: ใส่ E-mail ของผู้ใช้
Server Information:
- Account Type: เลือก IMAP หรือ POP3 แนะนำว่าให้เลือก IMAP
คุณสามารถดูแตกต่างระหว่าง IMAP และ POP ที่หัวข้อนี้
ความแตกต่างระหว่าง IMAP และ POP
- Incoming mail server: ใส่ E-mail ของ Server
- Outgoing mail server (SMTP): ใส่ E-mail ของ Server
Logon Information
- User Name: ระบุชื่อผู้ใช้งาน
- Password: ใส่รหัสผ่านของผู้ใช้งาน
จากนั้นกด More Settings
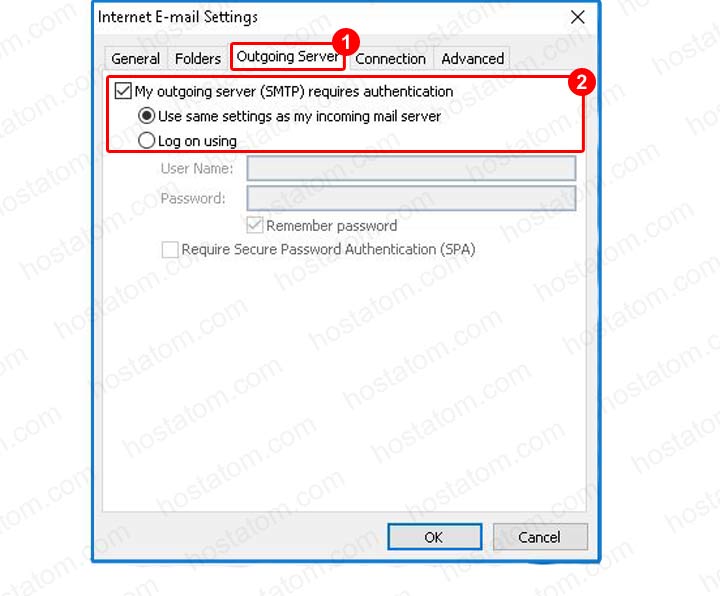
ขั้นตอนนี้ให้เลือก Tab Outgoing Server เลือก My outgoing server (SMTP) requires authentication ให้เลือก Use same settings as my incoming mail server (ขั้นตอนนี้ผู้ใช้มักจะลืม ทำให้เกิดปัญหาไม่สามารถส่งอีเมล์ออกได้)
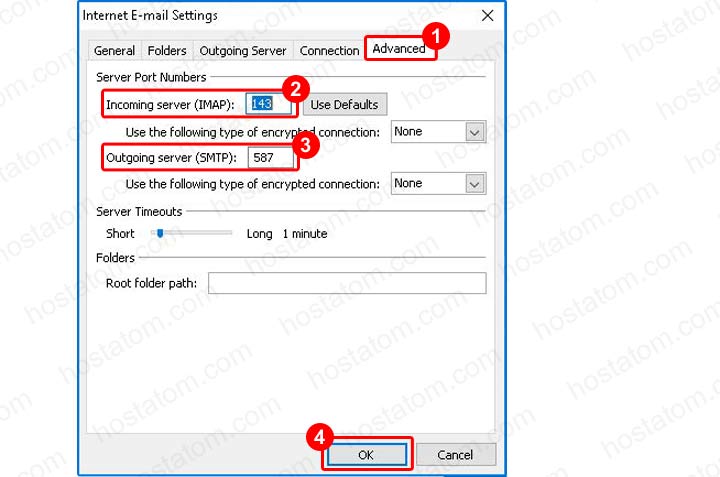
ที่ Tab Advanced ให้เปลี่ยน
- Incoming server : สำหรับ IMAP เป็น 143 ส่วน POP เป็น 110
- Outgoing server (SMTP): เป็น 587
จากนั้นกดปุ่ม OK
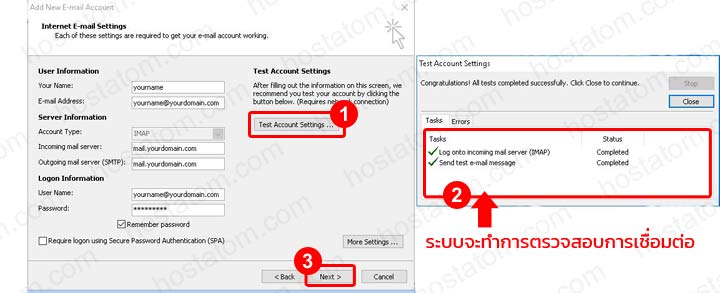
เพื่อทดสอบการเชื่อมต่อว่าสามารถเชื่อมต่อได้หรือไม่ ให้กดปุ่ม Test Account Setting เมื่อระบบตรวจสอบไม่พบปัญหาแล้วให้กดปุ่ม Next
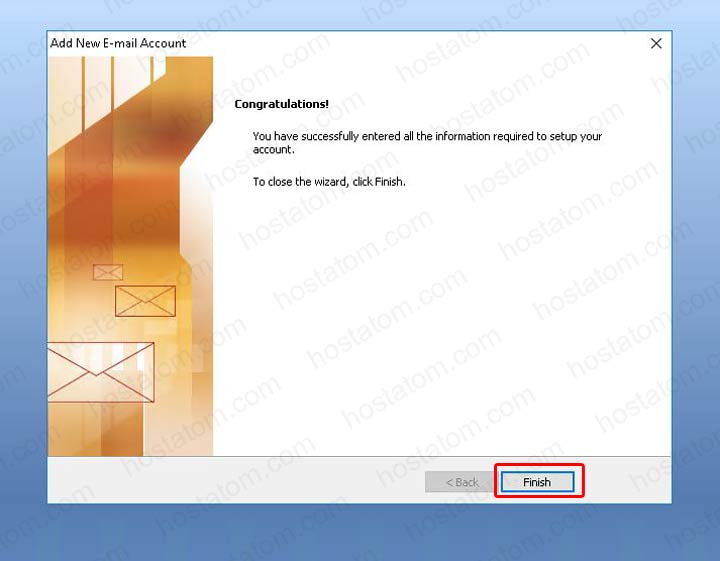
7. เสร็จสิ้นการตั้งค่า ให้กดปุ่ม Finish