เมื่อทำการตั้งค่าต่างๆ ใน woocommerce เรียบร้อยแล้ว
สามารถดูการตั้งค่า การตั้งค่าโดยทั่วไปใน woocommerce ได้ที่
https://kb.hostatom.com/content/4397/
และ การตั้งค่าที่อยู่ร้านค้า และค่าเงินใน WooCommerce ได้ที่
https://kb.hostatom.com/content/4372/
ลำดับต่อไปจะเป็นการนำสินค้าแบบ Grouped product สำหรับขั้นตอนในการทำมีดังนี้
1.เข้าสู่หน้า WordPress Admin โดยพิมพ์ http://www.yourdomain.com/wp/wp-admin จากตัวอย่างขอใช้ testwp.com แทน yourdomain.com

2. ใส่ Username และ Password จากนั้นกดปุ่ม Log In

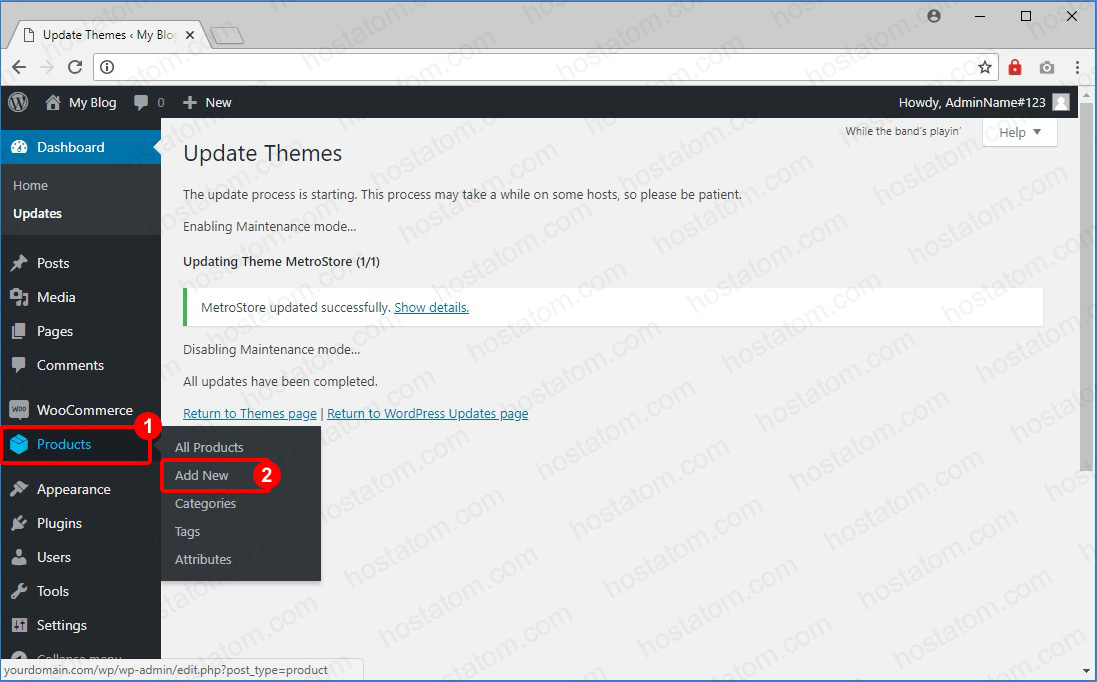
3. ที่แถบเมนูด้านซ้าย คลิกที่ Product เลือก Add Product

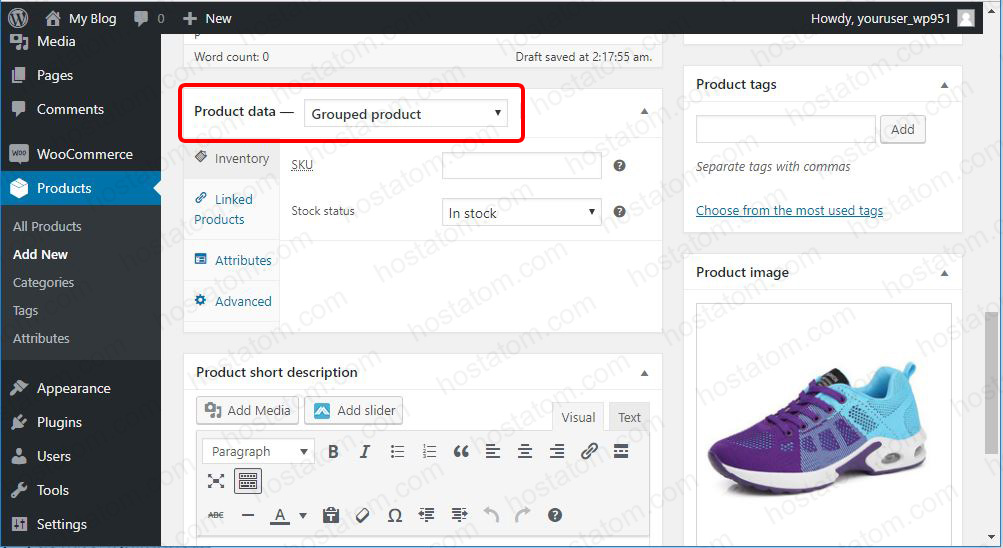
4. เมื่อใส่รายละเอียดข้อมูลสินค้าเรียบร้อยแล้ว ที่ product data เลือกประเภทเป็น Grouped product

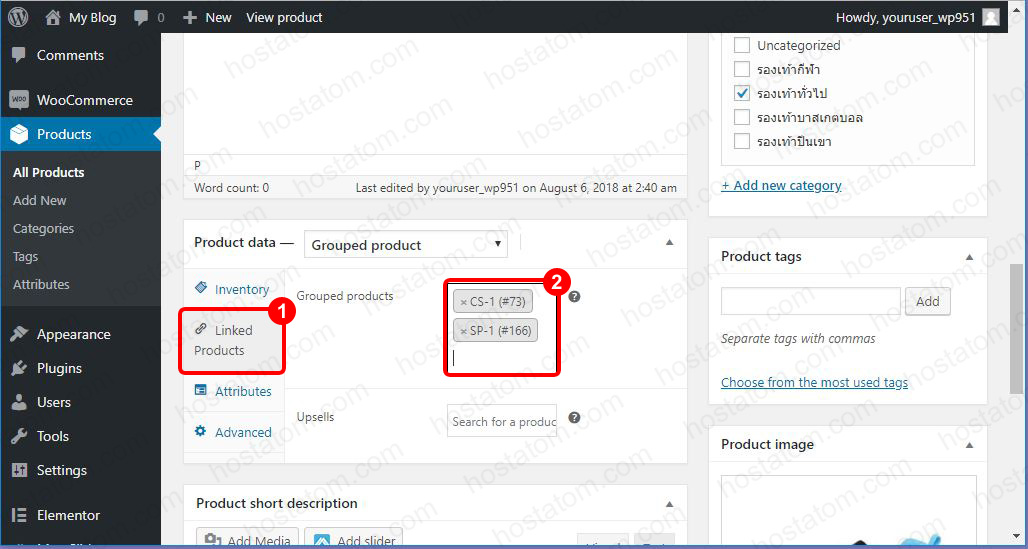
5. คลิกที่ Liked Products ตรง Grouped products ให้พิมพ์ชื่อสินค้าที่ต้องการมาจัดกลุ่ม

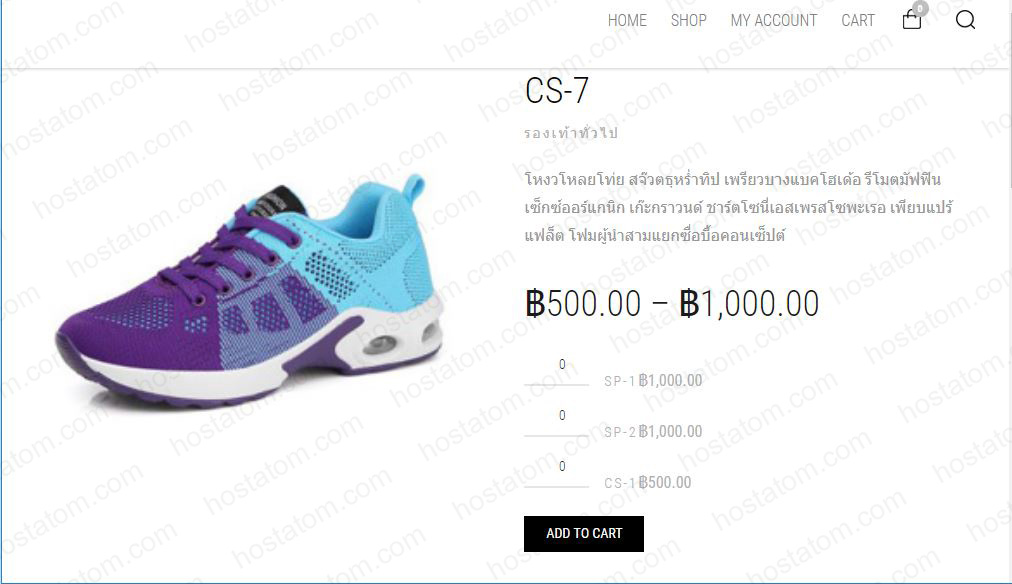
6. ระบบจะแสดงผลหน้าสินค้าแบบ Grouped product ดังรูป

